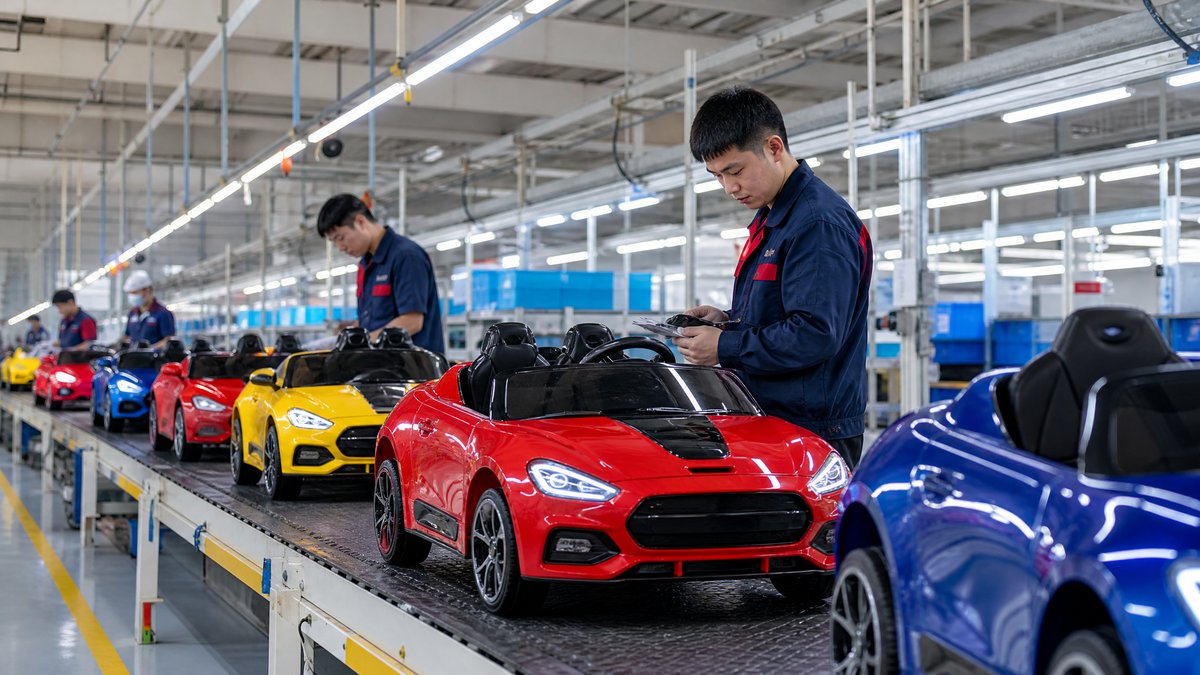
A kids ride-on car dealer starter kit is a ready-to-use package that helps a new retail partner select, present, sell, assemble, and support a small range of ride-on vehicles. For a distributor, the kit should combine approved product information with a sensible opening assortment, display guidance, safety materials, spare-parts planning, and a clear reorder process. It should not be a random box of samples or a generic sales folder.
The most practical approach is to build the kit in modules: choose a focused product range, document every SKU, prepare retail and demonstration materials, define handover and after-sales procedures, and create a simple review point after the dealer’s first selling cycle. This gives independent toy stores, baby shops, online retailers, and regional resellers a repeatable way to start without overcommitting inventory.
What should a kids ride-on car dealer starter kit include?
At minimum, include:
- A carefully selected opening assortment rather than every available model.
- A SKU data sheet for each vehicle and its included accessories.
- Approved images, product copy, dimensions, carton information, and age-grading details.
- Assembly, charging, storage, supervision, and care instructions.
- A display and demonstration checklist suitable for the dealer’s store format.
- A wholesale price list, order form, reorder rules, and stock-keeping guidance.
- A spare-parts and warranty contact process.
- A dealer FAQ and staff training sheet that explains product differences without making unsupported claims.
The distributor should tailor the contents to the dealer’s channel. A showroom may need a demonstration unit and floor signage, while an e-commerce seller may need image folders, accurate carton dimensions, and customer-service answers. A small regional retailer may need a compact assortment and a simple parts-request form rather than a large marketing package.
Step 1: Define the dealer’s sales model before choosing products
Do not build the kit around the distributor’s full catalog. Start by identifying how the dealer will sell. Ask whether the dealer operates a physical store, website, marketplace account, trade counter, seasonal pop-up, or a combination of channels. Also clarify available display space, warehouse capacity, target customer age ranges, preferred retail price bands, and expected reorder frequency.
A dealer starter kit works best when it answers three commercial questions:
1. Which few models can the dealer explain confidently?
2. Which products can the dealer display, ship, or collect without avoidable confusion?
3. What information will the dealer need when a parent asks about fit, use, charging, assembly, or support?
For example, a neighborhood toy retailer might begin with one compact single-seat model, one larger or two-seat option if appropriate for its customer base, and a demonstration unit. An online specialist could carry more color or body-style variations while keeping technical specifications consistent across listings. These are planning examples, not a recommendation to stock any particular voltage, motor, battery, or licensed design.
Use a written [product assortment planning guide](/blog/kids-electric-ride-on-car-product-assortment) to record the dealer’s channel, customer profile, initial quantity, storage limits, and reorder trigger. Keeping this record prevents the starter kit from becoming a collection of products chosen only because they look different in a catalog.
Step 2: Build a balanced opening assortment
A starter assortment should be narrow enough for staff to learn and broad enough to give shoppers a meaningful choice. One useful structure is:
A core entry model
This model should be easy for staff to position and suitable for the dealer’s main customer segment. The product sheet should state the manufacturer’s intended age guidance, dimensions, maximum load information, included controls, charging equipment, and any relevant operating limitations exactly as approved. Avoid translating a general feature into a promise about speed, terrain, runtime, or safety unless the claim is supported by the specific product documentation.
A differentiated upgrade model
The second model can offer a meaningful merchandising difference, such as a different body style, seat arrangement, control format, or appearance. The dealer needs a comparison table that shows what is different and what is not. A good table helps staff explain value without suggesting that one model is universally better for every child or environment.
A display or demonstration unit
A demonstration unit should be selected for visibility, manageable handling, and suitability for the dealer’s premises. Decide in writing whether it is saleable stock, a showroom sample, or a promotional unit. Establish who is responsible for charging, supervised demonstrations, cleaning, inspection, and removal from sale if it is damaged.
Optional seasonal or local-market items
Add optional models only when the dealer has evidence of demand or a clear seasonal plan. A distributor can use a separate option list so the first order stays focused. This protects cash flow and makes it easier to identify which products deserve replenishment.
Before confirming quantities, compare the starter kit with a [kids ride-on car wholesale RFQ](/blog/what-should-a-buyer-include-in-an-rfq-for-kids-electric-ride-on-cars). The same specifications should appear in the quotation, sample approval record, product file, and dealer materials.
Step 3: Create a dealer-ready product information pack
The information pack is the operational center of the kit. Give each SKU a consistent one- or two-page data sheet with:
- Model name, internal SKU, and approved product photographs.
- Vehicle dimensions, packaged dimensions, net and gross weight where confirmed.
- Intended age guidance and maximum load information from the product documentation.
- Seat configuration, control method, drive configuration, and included accessories.
- Battery and charger information, including compatibility details supplied by the manufacturer.
- Assembly status, key assembly steps, and a list of loose parts in the carton.
- Use limitations, supervision reminders, charging instructions, and storage guidance.
- Carton quantity, order unit, barcode or identifier if applicable, and reorder code.
- Warranty contact route and the information required for a claim.
Add a controlled version number and revision date. If a component, charger, color, packaging design, or instruction changes, the distributor can then replace old files instead of allowing conflicting specifications to circulate among dealers.
For online dealers, provide image filenames that match SKUs and a content sheet separating verified facts from optional marketing language. Direct dealers to [product pages](/products/) for current model information, but do not assume a public product page replaces the dealer’s internal file. Retail staff need quick answers about what is in the carton, what the customer must assemble, how the vehicle is charged, and where to seek support.
Step 4: Add merchandising and demonstration tools
A dealer starter kit should make the products easy to understand at the point of sale. The exact materials depend on the store, but may include:
- A model comparison card using plain, accurate language.
- A shelf, floor, or table sign showing the product name and key specifications.
- A QR code or short link to the current manual and product page.
- A supervised demonstration checklist.
- A carton-opening and display-positioning guide.
- A staff question card covering age guidance, fit, charging, remote control, assembly, and after-sales support.
Demonstrations require controls. Tell dealers to follow the product instructions, keep children supervised, use an appropriate area, check the unit before use, and prevent operation near traffic, water, stairs, or other hazards. Demonstration practice should not involve bypassing protections, modifying wiring, soldering, opening batteries, or attempting internal repairs. Suspected electrical or mechanical faults should be taken out of use and routed through the approved service process.
A store can use a static display when movement is not appropriate. If a moving demonstration is permitted by the product instructions and the dealer’s risk procedures, document who supervises it and how the unit is checked before and after the event. Keep safety guidance model-neutral and tied to the supplied manual rather than promising that a feature eliminates risk.
Step 5: Include an after-sales and spare-parts module
Dealers need to know what happens after the sale. Include a one-page escalation map that shows:
1. What information the dealer collects from the customer.
2. Which basic user checks are allowed under the manual.
3. When the dealer stops troubleshooting and contacts the distributor.
4. How photographs, videos, model identifiers, and purchase details are submitted.
5. How the distributor decides between advice, a replacement part, inspection, or another remedy.
6. How damaged, unsafe, or modified units are handled.
The starter kit should never encourage a dealer or consumer to open a battery, rewire a vehicle, solder a connection, defeat a protective device, or perform an internal repair without authorized technical direction. Include clear instructions to stop use when a product appears damaged or behaves abnormally.
A practical first parts list may include only items that the distributor can identify and supply consistently, such as approved chargers, remote controls, wheels, cosmetic panels, or other model-specific service items. Do not promise availability, lead times, or interchangeability unless confirmed. Use the [spare-parts catalog](/blog/kids-electric-ride-on-car-spare-parts-guide) and a request form that requires the exact SKU and production or batch information when available.
Step 6: Give the dealer a commercial control pack
The commercial section should help a dealer reorder profitably without hiding product differences. Include:
- Current wholesale pricing and the date it becomes effective.
- Minimum order rules and mixed-model ordering conditions, if applicable.
- Packing quantity and carton information.
- Payment and shipping terms agreed for that dealer.
- Recommended stock-review frequency rather than an unsupported sales forecast.
- A reorder form with SKU, color, quantity, destination, and requested ship window fields.
- A returns, damage-reporting, and claims reference.
A distributor can provide a simple stock card with columns for opening quantity, received units, sold units, damaged units, demonstration units, current stock, and reorder decision. The dealer should review actual sales and customer questions before expanding the range. This is more reliable than adding products simply because a catalog has many options.
For a new account, consider a staged order: a focused first shipment, a review after the dealer has gathered real customer feedback, and a second order based on evidence. The exact order size and timing should be agreed commercially; do not present a universal MOQ, margin, or delivery promise.
Step 7: Train the dealer with a short, repeatable session
Training does not need to be long to be useful. A 30- to 45-minute session can cover the assortment, product comparison, safe demonstration, carton contents, charging information, customer questions, and escalation procedure. Give staff a quiz or checklist that confirms they can locate the manual, identify each SKU, explain intended use, and find the support contact.
Use realistic but non-claiming practice questions:
- “How do I choose between these two models?”
- “What should I check before charging?”
- “What does the customer need to assemble?”
- “What should I do if the remote control or vehicle does not work?”
- “Can this product be used in rain or on a slope?”
The correct response should point to the model-specific instructions and approved information. Staff should not improvise legal, medical, certification, or performance conclusions. Where a country-specific requirement applies, the dealer should follow the distributor’s product compliance file and obtain local professional advice where appropriate.
A practical starter-kit checklist
Before sending the kit, the distributor can use this final review:
- Has every item been matched to a specific dealer channel?
- Are SKU names and specifications identical across files?
- Are images and product claims approved and current?
- Are manuals, warnings, charging instructions, and assembly information included?
- Is the demonstration plan supervised and free of modification advice?
- Is the warranty and escalation route clear?
- Are spare-part identifiers and request fields complete?
- Are price, order, packing, and shipping terms dated?
- Does the dealer know how to report carton damage or a product issue?
- Is there a scheduled review of first-order sales and support questions?
A distributor can turn this into a digital folder with a printed quick-start sheet. Use a consistent naming convention such as SKU, document type, language, and revision date. That small discipline reduces the risk that a dealer publishes an old specification or gives a customer instructions for a different model.
Frequently Asked Questions
Is a dealer starter kit the same as a product catalog?
No. A catalog presents products; a starter kit helps a dealer operate them commercially. It adds assortment logic, product files, display guidance, training, service procedures, and reorder controls. A catalog may be one component of the kit.
How many kids ride-on car models should a new dealer start with?
There is no universal number. Start with the smallest range that covers the dealer’s target customer and sales channel, then review actual demand, customer questions, stock movement, and service workload. A focused assortment is usually easier to explain and support than a broad, unstructured range.
Should the dealer receive a demonstration vehicle?
Possibly, if the store has suitable space, supervision, and a clear procedure for charging, inspection, cleaning, and removal from service. A static display may be more appropriate where movement cannot be controlled. Decide whether the unit is saleable stock or a dedicated sample before shipping it.
What should a dealer do when a ride-on car appears faulty?
The dealer should stop use when appropriate, follow the model’s user instructions, record the SKU and issue, and contact the distributor through the agreed escalation route. Do not advise bypassing protections, opening batteries, rewiring, soldering, or carrying out internal repairs.
Conclusion: Make the first order easy to sell and support
A strong kids ride-on car dealer starter kit is not defined by its size. It is defined by how well it connects the first order to accurate product information, responsible demonstrations, practical staff training, service support, and disciplined reordering. Build the package around the dealer’s channel, keep the opening assortment focused, control document versions, and review real sales and support feedback before expanding.
For help selecting a distributor-ready product mix, preparing SKU documentation, or discussing OEM and wholesale requirements, [contact KidsRideCar](/inquiry) or email info@kidsridecar.com.
Official references
Explore these external resources for current regulatory and trade guidance. Confirm requirements with the relevant authority before placing an order.
Ready to Start?
Factory-Direct · CE & ASTM Certified · MOQ from 50 Units
Our export team works with buyers in 60+ countries. Get a quote within 24 hours.
KR
Written by KidsRideCar
China's leading kids electric ride-on car manufacturer. 500,000+ units shipped annually to 60+ countries. CE, ASTM & EN71 certified.