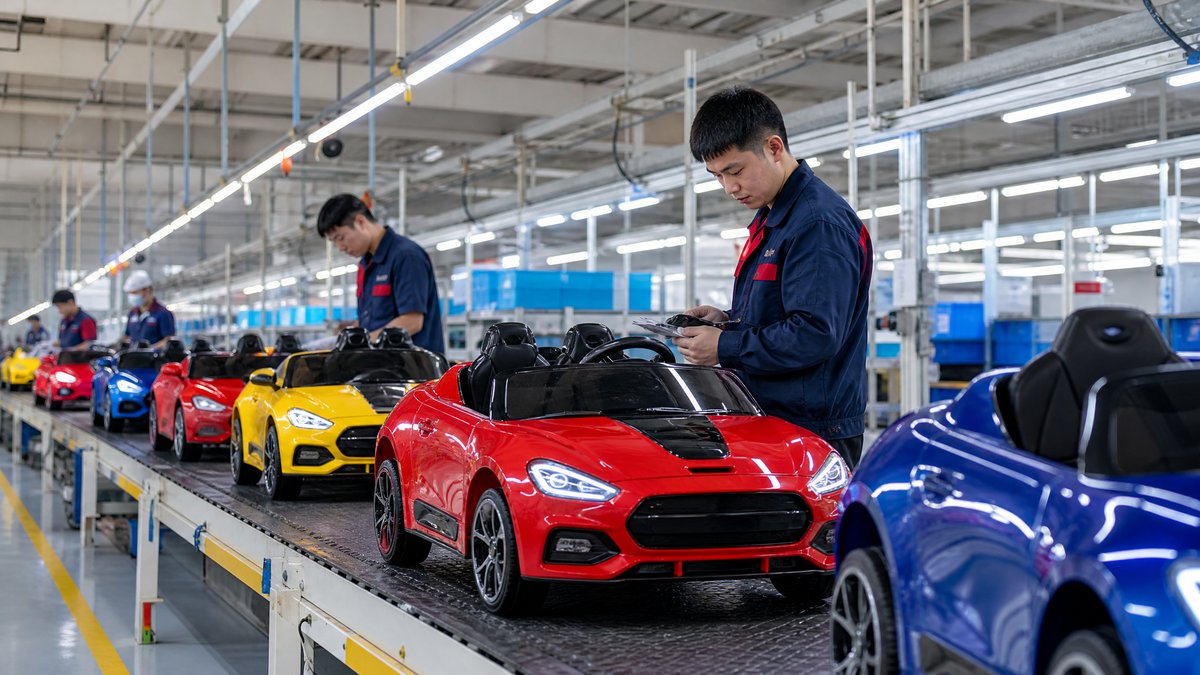
For an OEM buyer, brand guidelines are more than a logo page. They are the working rules that connect the approved kids ride-on car, packaging, manuals, online listings, dealer materials, and after-sales communication. A useful review checks whether the document is specific enough for a factory and practical enough for retailers in the target market.
The short answer is this: review the guidelines against the complete product journey. Confirm brand assets, product naming, color and artwork rules, safety language, claims, localization, approval responsibilities, and change control. Then convert the approved document into a supplier-ready checklist tied to each SKU and sales channel.
This process helps importers, wholesalers, distributors, retailers, and OEM teams reduce avoidable artwork errors without making unsupported claims about certifications, performance, or legal compliance.
What Should an OEM Buyer Look for First?
Start by asking whether the guidelines answer five basic questions:
1. What is the brand? The document should define the approved logo, wordmark, tone of voice, colors, typography, imagery, and product naming conventions.
2. Where will the rules apply? Identify the car body, labels, carton, manual, website, marketplace listing, point-of-sale display, spare-parts packaging, and dealer materials.
3. Who approves changes? Name the buyer-side and supplier-side owners for artwork, samples, translations, product claims, and final release.
4. Which statements are proven? Separate confirmed product facts from marketing language that still needs evidence or approval.
5. How is the current version controlled? Every file should have a version, date, owner, and approval status.
If a guideline only shows a logo and color swatch, it is not yet an operational OEM standard. The factory should be able to use it without guessing.
1. Check the Brand Foundation and Asset Library
A brand-guideline review should begin with the master assets. Request editable and production-ready files in formats the relevant teams can use. These may include vector logos, approved color references, typefaces or permitted substitutes, icon files, product photography rules, and image-use instructions.
Check the following points:
- Are the primary logo, secondary logo, monochrome version, and minimum-size rules clearly separated?
- Does the document show clear space around the mark and examples of prohibited use?
- Are color references defined for print and digital work rather than described only as “blue” or “red”?
- Are fonts available to the packaging designer, factory, e-commerce team, and translator?
- Are product images required to show a particular angle, background, child-safety context, or amount of empty space?
- Does the asset library identify which images may be used commercially and which are for internal review only?
For example, an OEM team may approve a logo on the hood, steering wheel, carton front, and website header. The guideline should identify the exact artwork file and placement rule for each use. “Use the logo prominently” leaves too much room for interpretation.
Keep the brand review separate from an assessment of a specific model. You can compare approved products through the [KidsRideCar product range](/products/) while still applying one consistent brand system across several body styles or electrical configurations.
2. Match the Guidelines to the OEM Product Brief
A brand guide cannot replace a product brief. Compare both documents line by line before approving artwork. The product brief should identify the model name, SKU, intended market, age-grading information supplied by the manufacturer, dimensions, included accessories, power and charging information, warnings, packaging configuration, and any approved options.
The brand guide should explain how those facts appear—not change them. For example, if a model is offered in several colors, define whether the color name is a consumer-facing name, a factory code, or both. If a two-seat model has a different carton illustration from a single-seat model, state where the distinction appears on the front, side, and product listing.
Create a simple mapping table for each SKU, recording the product detail, source of truth, brand instruction, and approval evidence. This prevents a common OEM problem: the carton, manual, online listing, and sample use slightly different names or descriptions for the same product.
3. Review Product Naming and Architecture
A scalable naming system is particularly important when a distributor will sell several models. Decide whether names describe a vehicle style, a series, a voltage category, a seating arrangement, or a feature group. Avoid using a name that implies a performance level or function the product does not have.
Ask the supplier and internal team to confirm the official model name and SKU format, capitalization rules, variant notation, handling of any licensed marks, and whether regional commercial names differ.
A retailer may list “Series A 2-Seater” while a carton says “A2.” That may be acceptable if documented, but it should never be accidental. Give service, warehouse, and dealer teams a cross-reference sheet. See the [OEM product catalog guide](/blog/kids-electric-ride-on-car-product-catalog) for a related content check.
4. Audit Packaging, Labels, and Manuals as One System
Packaging is where brand identity and product information meet. Review the front, sides, top, inner packaging, shipping carton, warning panels, barcode area, country-of-origin field where required, importer details where applicable, and recycling or handling marks used for the target market. Do not assume one artwork file is suitable for every destination.
A practical packaging review asks:
- Is the product shown in the same configuration that customers receive?
- Are included accessories represented accurately?
- Is the model, color, and quantity easy for warehouse teams to identify?
- Are warnings and instructions legible at the intended print size?
- Are translations complete, consistent, and reviewed by the responsible market team?
- Does the carton avoid unsupported claims such as “safest,” “unbreakable,” or guaranteed runtime?
- Are barcode, batch, serial, or traceability fields placed where operations can use them?
Review the manual, quick-start sheet, carton, and online content together. Charging instructions, supervision statements, age information, and warnings should not conflict. Safety wording should be based on the approved product information and applicable market review; the brand guide should specify tone and layout, not invent technical or legal conclusions.
5. Separate Brand Claims from Verified Product Facts
OEM artwork often contains selling points such as “smooth start,” “parental control,” “outdoor-ready,” or “premium materials.” Each claim should have an owner and evidence path before it reaches a carton or listing.
Build a claims register with these columns:
- Exact claim text.
- Product or document source.
- Applicable SKU or variant.
- Market and language.
- Evidence or approval required.
- Status: draft, approved, rejected, or restricted.
- Expiry or review date if the claim depends on a changing document.
Use precise language. “Includes a parental remote control” is a product-inclusion statement if verified for that SKU. “Prevents accidents” is a safety outcome claim and should not be used casually. “Suitable for outdoor use” needs clear conditions and user instructions rather than a broad promise about every surface or weather condition.
Model-neutral safety guidance is essential. A brand guideline should direct users to follow the manual, supervise children, use the product only as intended, keep charging and battery handling within the supplied instructions, and stop using a product that appears damaged until it has been assessed through the approved service process. It should never instruct users to bypass protections, rewire components, solder connections, open batteries, or carry out internal repairs.
6. Check Localization for Each Target Market
A global brand guide needs a localization layer. The visual identity may stay consistent, while wording, units, warnings, customer-service details, and packaging fields change by destination.
Ask the OEM supplier for a localization matrix covering region, languages, approved names, units, warning source, service fields, marketplace rules, and reviewer/date.
Do not solve localization by asking a factory to translate marketing copy informally at the last minute. A distributor should review comprehension, while the responsible market reviewer handles local requirements. The brand guide can define a clear, calm, age-appropriate voice without substituting for professional review.
7. Define the Artwork and Sample Approval Workflow
The best guideline includes a workflow, not only visual rules. A practical sequence is:
1. Buyer issues the current brand and product files.
2. Supplier prepares a digital proof for carton, label, manual, listing images, and accessories.
3. Buyer checks names, colors, claims, translations, dimensions, warnings, and included items.
4. Supplier produces a pre-production sample or representative print proof where appropriate.
5. Buyer records changes in a controlled change log.
6. Authorized reviewers approve the final version in writing.
7. Supplier archives the released file and removes obsolete versions from production use.
8. Any later change follows the same review process.
Use a file-naming convention that includes SKU, market, asset type, language, version, and date, such as `KRC-SERIES-A-CARTON-EN-UK-V03`.
Approval should be evidence-based. Keep marked-up proofs, color references, product photos, translation approvals, and final sign-off together. This gives the buyer and supplier a shared record if the sample, carton, or listing later differs from the approved version.
8. Review Dealer, Retail, and Digital Use Cases
Brand consistency extends beyond the factory. A wholesaler may need a dealer pack; a retailer may need marketplace images; a distributor may create a showroom display or product comparison chart. The guidelines should state what partners can edit and what they cannot edit.
Clarify rules for:
- Resizing or cropping approved product images.
- Adding retailer logos or promotional badges.
- Translating product copy.
- Showing a child using the product in lifestyle photography.
- Comparing models in a table.
- Displaying prices, promotions, or bundle contents.
- Reusing carton artwork in online listings.
- Linking to manuals, spare-parts information, or the [OEM inquiry page](/inquiry).
A retailer should not be allowed to remove warnings or alter a product image so that an accessory appears included when it is not. Conversely, a distributor should have a clear path to request a market-specific banner, dealer logo lockup, or translated image without editing master files independently.
9. Test the Guidelines with a Procurement Scenario
Before release, run a tabletop exercise. Give the factory the brand guide, product brief, target market, and a sample purchase-order scenario. Ask the supplier to prepare a carton front, one side panel, a manual cover, a product-page image set, and a dealer summary.
Then check whether two reviewers reach the same result. If they do not, the rule is not clear enough. Typical gaps include an undefined logo size, a color that changes between print and digital, an unclear model hierarchy, missing accessory notation, conflicting translations, and claims that have no evidence owner.
For example, a distributor ordering three colors of one model might need one master carton layout with variable color panels. The guideline should say which elements are fixed, which are variable, how color codes are shown, and who approves the final proof. This is a procurement control—not a reason to promise a particular production result or delivery schedule.
10. Create a Final OEM Buyer Checklist
Before approving the brand guidelines, confirm that you have:
- A current master asset library.
- Logo, color, type, imagery, and prohibited-use rules.
- SKU naming and product-variant rules.
- A claims register and evidence owner.
- Packaging, label, manual, and online-content instructions.
- A market and language localization matrix.
- Safety-message ownership and escalation contacts.
- An artwork version-control method.
- A sample and proof approval workflow.
- Rules for dealer and retailer adaptations.
- A change-request and withdrawal process.
- Contact details for final approval and after-sales questions.
The final question is simple: could a new supplier designer, warehouse coordinator, translator, and retailer each use the document correctly without a private explanation? If not, add examples, templates, or decision rules before mass artwork is released.
Frequently Asked Questions
Are brand guidelines the same as an OEM product specification?
No. Brand guidelines control identity, presentation, wording style, and approved usage. An OEM product specification controls the product’s physical, electrical, packaging, and documentation details. They should cross-reference each other, but neither should silently replace the other.
Should an OEM buyer approve packaging before the product sample?
The buyer should review packaging concepts early, but final approval should wait until the model, included items, identifiers, warnings, and other product information are confirmed. A controlled pre-production proof or sample helps catch differences before release.
How should buyers handle a supplier’s proposed brand change?
Ask for the reason, affected SKUs, artwork files, product documents, markets, and timing. Record the proposal in a change log, assess its effect on packaging and listings, and approve or reject it through the documented workflow. Do not allow an undocumented substitution into production.
Can a retailer edit OEM product images or claims?
Only within the permissions defined by the brand owner. Cropping, adding a retailer logo, translating copy, or changing a claim can affect accuracy and brand control. Supply approved variants or require review before modified material is published.
What should happen when a guideline conflicts with a product manual?
Pause approval and identify the responsible source of truth. The buyer, supplier, and relevant market reviewer should resolve the conflict before the carton, manual, listing, or dealer material is released. The final decision and revised file should be recorded with a new version.
Conclusion
Reviewing kids ride-on car brand guidelines is a procurement discipline, not just a design exercise. OEM buyers should test the document across the product brief, factory artwork, packaging, manuals, translations, claims, digital listings, dealer materials, and change-control process. Clear ownership and versioned approvals help every channel present the same product accurately.
If you are preparing a private-label range or need help organizing a supplier-ready OEM brief, contact KidsRideCar at info@kidsridecar.com or submit your requirements through the [OEM inquiry page](/inquiry).
Official references
Explore these external resources for current regulatory and trade guidance. Confirm requirements with the relevant authority before placing an order.
Ready to Start?
Factory-Direct · CE & ASTM Certified · MOQ from 50 Units
Our export team works with buyers in 60+ countries. Get a quote within 24 hours.
KR
Written by KidsRideCar
China's leading kids electric ride-on car manufacturer. 500,000+ units shipped annually to 60+ countries. CE, ASTM & EN71 certified.