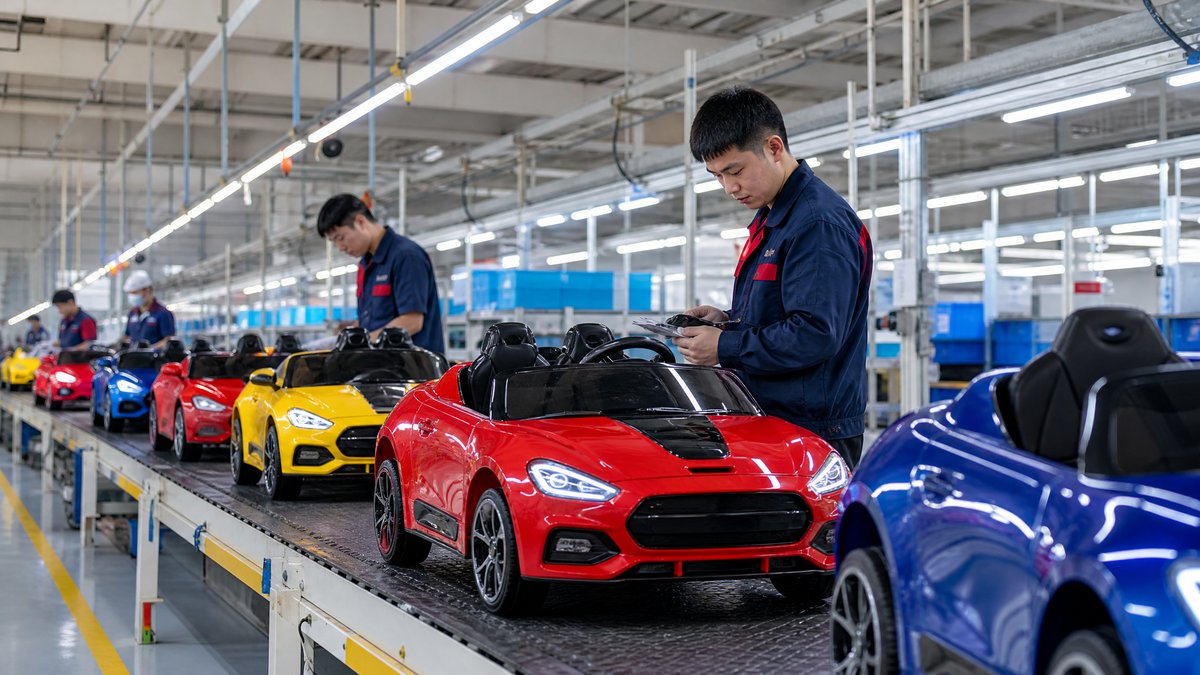
For a distributor, a kids ride-on car floor display is more than a platform for showing a product. It is a sales tool, a safety-control point, a sample of the brand’s professionalism, and a recurring operating cost for every retail location. The best display helps shoppers understand the model quickly, lets staff demonstrate it responsibly, and keeps the unit presentable without creating avoidable service work.
Concise answer: distributors should evaluate a floor display against six questions: Does it attract attention from the intended shopping path? Does it present the product clearly within the available footprint? Can staff operate a controlled demonstration safely? Is it durable and easy to clean? Can the retailer restock and service it without confusion? Does the supplier provide consistent specifications, artwork, instructions, and replacement support? A display that looks impressive but blocks aisles, invites uncontrolled use, or cannot be maintained is not a strong B2B solution.
This guide is designed for overseas importers, wholesalers, distributors, retailers, and OEM buyers comparing display concepts before a rollout. It complements a [kids ride-on car product range](/products/) review, but it does not replace the product’s own instructions, warnings, or market-specific review.
1. Start with the Retail Job to Be Done
Before comparing materials or graphics, define what the display must achieve. A compact display in a specialist toy shop may need to explain the product and support a short staff-led demonstration. A larger showroom display may need to show several models, colors, or age-positioned choices. A distributor’s own trade counter may prioritize lead qualification and product comparison rather than immediate consumer sales.
Write down the intended outcome in practical terms:
- Help shoppers notice a featured model from a defined approach path.
- Make key product information readable without a salesperson standing beside the unit.
- Give trained staff a controlled way to explain features and operation.
- Protect the sample from tipping, collision, unauthorized movement, and rough handling.
- Keep the area clean and easy for store employees to reset.
- Create a repeatable format that can be supplied to multiple retailers.
This step prevents a common purchasing mistake: approving a display because it looks attractive in a presentation image without confirming how it will work in an actual store.
2. Check Footprint, Access, and Store Compatibility
A floor display must fit the retail environment, not just the ride-on car. Request a dimensional drawing that shows the complete installed footprint, including any base, header, side panels, rails, signage, power equipment, and demonstration controls. Confirm both the display’s external dimensions and the space needed for customers and staff to approach it.
Ask the retailer to review:
- Available floor width, depth, and ceiling clearance.
- Customer approach direction and sightlines from key aisles.
- Nearby shelves, checkout queues, fire exits, doors, columns, and promotional fixtures.
- Cleaning access around and beneath the base.
- A practical location for a staff member to stand during a demonstration.
- Whether the unit can enter the store through doors, lifts, or loading routes.
- Whether it can be moved or reconfigured when the store changes its layout.
Do not treat “fits on the floor” as the same as “fits the store.” A display can occupy a nominally available rectangle while creating a pinch point or hiding adjacent merchandise. The buyer should approve the installed layout with the retailer, ideally using a floor plan or a marked-up site photo.
For multi-country distribution, ask whether the display can be packed efficiently and whether the same design can be adapted to different store formats. If the answer is a custom design, clarify which dimensions are fixed and which can change before requesting an OEM quotation through the [inquiry page](/inquiry).
3. Evaluate Visibility Without Overloading the Display
Visibility is not simply a matter of making the header larger. The product should be recognizable from the normal customer approach, while the message remains easy to scan. A strong display usually has a clear visual hierarchy:
1. Brand or category identification.
2. The featured model and its primary use proposition.
3. A short set of verified product attributes.
4. A prompt for staff assistance, product comparison, or further information.
Use the display to answer the questions a buyer is likely to ask first: Who is this product for? What type of use is intended? What should the shopper compare? Where can they find operating and safety information?
Avoid filling every panel with specifications. Small type, excessive feature icons, and unverified claims reduce trust. The copy should match the approved product data sheet and the packaging. If the display is used for different models, make it obvious which information applies to which unit. A [product data sheet](/blog/what-product-data-should-a-kids-ride-on-car-wholesale-catalog-include) can carry detailed information that would make the floor display too busy.
Review graphics at the distance from which shoppers will actually see them. Check contrast, glare, color consistency, language versions, and whether the vehicle’s own shape hides important text. For an OEM or private-label program, approve the logo placement, brand colors, legal copy, and artwork version through a documented change process rather than relying on informal messages.
4. Decide Whether a Demonstration Is Appropriate
A display does not automatically need an operating demonstration. Some retailers want a static sample that customers can inspect. Others want trained staff to operate selected functions under controlled conditions. The choice should reflect the store, the product, the available supervision, and the retailer’s risk controls.
If a demonstration is planned, document the boundaries before ordering. Consider:
- Who may activate the unit and under what supervision.
- Whether the vehicle remains secured to the display or is otherwise prevented from entering customer traffic.
- How the controls are stored when the display is unattended.
- How staff prevent a child from climbing in or operating the unit without permission.
- Whether the demonstration occurs with the vehicle stationary or in a defined, unobstructed area.
- How the unit is switched off, isolated, and reset after use.
- What staff should do if the sample shows an unusual sound, movement, heat, damage, or other concern.
Use the model’s supplied instructions and warnings as the source for operation. Do not ask store staff to bypass protective features, rewire controls, open batteries, solder connections, or perform internal repairs. A display program should include a simple stop-and-escalate rule: discontinue use, make the sample unavailable, record the issue, and follow the supplier or retailer’s approved service process.
A [safe demo program](/blog/how-can-retailers-build-a-safe-demo-program-for-kids-electric-ride-on-cars) is an operational document, not just a marketing idea. If a retailer cannot provide appropriate supervision, a static display may be the better option.
5. Review Stability, Edges, and Physical Protection
The floor display and the vehicle sample form one customer-facing installation. Inspect the concept for stability, resistance to ordinary contact, and the absence of avoidable hazards. Ask the supplier to identify the materials, fasteners, protective finishes, and assembly method, but do not assume a material name alone proves suitability.
During sample review, check for:
- A stable base that does not rock during normal customer contact.
- Secure retention of the vehicle where retention is part of the design.
- No accessible sharp edges, protruding fasteners, pinch points, or loose trim.
- Rounded or protected corners in customer contact zones.
- Signage and accessories that cannot easily fall onto shoppers.
- Adequate separation from adjacent products and walkways.
- A clear method for staff to inspect the fixture after moving or reassembling it.
The display should not encourage unsafe climbing, hanging, or unsupervised riding. If the sample includes a seat, steering wheel, doors, or other interactive parts, state clearly how customers may interact with it. Keep safety language model-neutral and aligned with the applicable product instructions and the retailer’s own procedures.
For final approval, inspect an assembled sample in the intended orientation. A flat artwork proof cannot show whether a base flexes, a panel obstructs access, or a component becomes loose after assembly.
6. Assess Materials, Cleaning, and Retail Wear
Retail displays experience more contact than most home-use samples. Children may touch the body, press controls, pull doors, or lean against the fixture. Staff may move cartons, sweep around the base, and wipe surfaces repeatedly. Ask how the display is expected to be cleaned and what products should be avoided.
Review these practical points:
- Whether surfaces are wipeable and resistant to ordinary retail dirt.
- Whether graphics are protected from routine cleaning.
- Whether dust collects in recessed areas or under the vehicle.
- Whether replacement graphic panels or small fixture components can be ordered.
- Whether the display can be disassembled without damaging the product or artwork.
- Whether packaging protects the display during shipment and store transfer.
Do not accept unsupported claims such as “scratch-proof” or “indestructible.” Instead, ask what care instructions, inspection points, and replacement options the supplier can document. A distributor can then set realistic expectations with retailers and include the relevant information in a [dealer onboarding kit](/blog/what-should-a-kids-electric-ride-on-car-distributor-include-in-a-retailer-onboarding-kit).
7. Confirm Information, Power, and Documentation
An interactive display may require power, charging, or a demonstration controller. Confirm exactly what is included and who is responsible for installation. Review cable routing, access to the power source, storage of accessories, and the process for taking the sample out of service. Cables should not create a trip hazard or cross a customer route.
Request a display pack containing, as applicable:
- Assembly instructions and a parts list.
- Final artwork files or approved print proofs.
- Vehicle model identification and product data.
- Operating instructions and warnings for any demonstration.
- Cleaning and inspection guidance.
- A contact path for display, product, and warranty issues.
- A list of replaceable display components and ordering references.
- Photographs showing the correct assembled configuration.
Keep the display documentation separate from assumptions about regulatory approval. The buyer remains responsible for reviewing the requirements that apply to the product, display, electrical setup, and sales channel in each market. Where questions are jurisdiction-specific, obtain qualified local advice rather than treating a supplier’s general statement as a legal conclusion.
8. Build a Distributor Evaluation Scorecard
A scorecard makes different display proposals easier to compare and creates a record for retailer conversations. Use weighted criteria that reflect the intended channel. For example, a distributor might score each concept from “not demonstrated” to “fully documented” across:
- Retail footprint and installation fit.
- Visibility and information hierarchy.
- Demonstration control and staff workflow.
- Stability and customer-contact safety.
- Material durability and cleanability.
- Packaging, assembly, and transfer between locations.
- Artwork localization and brand consistency.
- Documentation and training support.
- Replacement parts and after-sales response.
- Cost and commercial terms as quoted by the supplier.
Do not award a high score merely because a supplier promises a feature. Mark whether it is shown on a sample, supported by a drawing, included in the quotation, or still to be confirmed. This distinction helps prevent disagreements when the approved display reaches a retailer.
A practical procurement record should include the display revision, featured model numbers, approved artwork, dimensional drawings, demonstration rules, and open questions. Link the decision to the [sample approval process](/blog/what-is-a-practical-ride-on-car-sample-approval-process-for-buyers) so that changes are controlled before mass production.
9. Compare the Total Operating Commitment
The purchase price is only one part of a floor-display decision. Compare the quoted display, sample vehicle, freight volume, installation labor, graphics, store training, maintenance, replacement components, and eventual removal or refresh. Ask whether different retailers will need different bases, language panels, or power arrangements.
A lower-cost fixture may require more staff time to assemble or more frequent replacement of exposed graphics. A premium fixture may be justified when it can be reused across models, but only if the supplier explains how the changeover works and which components remain compatible. Do not invent a return-on-investment figure without reliable store data. Instead, set measurable review points such as display condition, staff usage, shopper questions, sample availability, and reorder conversations.
Frequently Asked Questions
What is the most important factor when evaluating a kids ride-on car floor display?
The most important factor is fit for the intended retail operation. Visibility matters, but the display must also fit the store, support a controlled customer experience, remain stable and cleanable, and come with usable documentation. A beautiful fixture that cannot be supervised or maintained is a poor distributor solution.
Should every ride-on car floor display include an operating demo?
No. A static sample may be more suitable when floor space, supervision, or store procedures do not support operation. If a demonstration is used, define who may activate it, how the sample is controlled, and what happens when damage or abnormal behavior is noticed. Follow the product instructions and never bypass protections or attempt internal repairs.
What should a distributor request from the supplier before approving a display?
Request complete dimensions, an assembly and parts list, final artwork, product identification, demonstration instructions, cleaning guidance, packaging details, and a clear support contact. Ask which items are included in the quotation and which are optional. Approve a physical or fully representative sample when stability, access, or customer interaction cannot be judged from drawings alone.
How can a display support several ride-on car models?
Use a modular approach only when the supplier documents the compatible model range, mounting points, graphics, and changeover process. Keep model-specific specifications and warnings clearly separated. Do not use a generic claim to cover products with different instructions or features.
How often should a distributor review a retail display?
Set a review rhythm that matches store traffic and the display’s level of interaction. The review can cover condition, cleanliness, artwork accuracy, sample availability, unauthorized changes, and staff questions. Review the display again whenever the featured model, packaging, operating instructions, or retailer layout changes.
Conclusion: Approve the Display as an Operating System
The right kids ride-on car floor display combines merchandising clarity with disciplined retail operation. Distributors should approve it only after checking the footprint, sightlines, customer interaction, stability, cleaning needs, documentation, and support plan. The goal is not to build the most elaborate fixture; it is to create a repeatable presentation that retailers can use responsibly and maintain consistently.
If you are planning a distributor program, private-label launch, or retail display package, share your target market, store format, featured models, and display objectives with KidsRideCar. [Contact the KidsRideCar team](/inquiry) or email info@kidsridecar.com to discuss a practical display and product-sourcing brief.
Official references
Explore these external resources for current regulatory and trade guidance. Confirm requirements with the relevant authority before placing an order.
Ready to Start?
Factory-Direct · CE & ASTM Certified · MOQ from 50 Units
Our export team works with buyers in 60+ countries. Get a quote within 24 hours.
KR
Written by KidsRideCar
China's leading kids electric ride-on car manufacturer. 500,000+ units shipped annually to 60+ countries. CE, ASTM & EN71 certified.