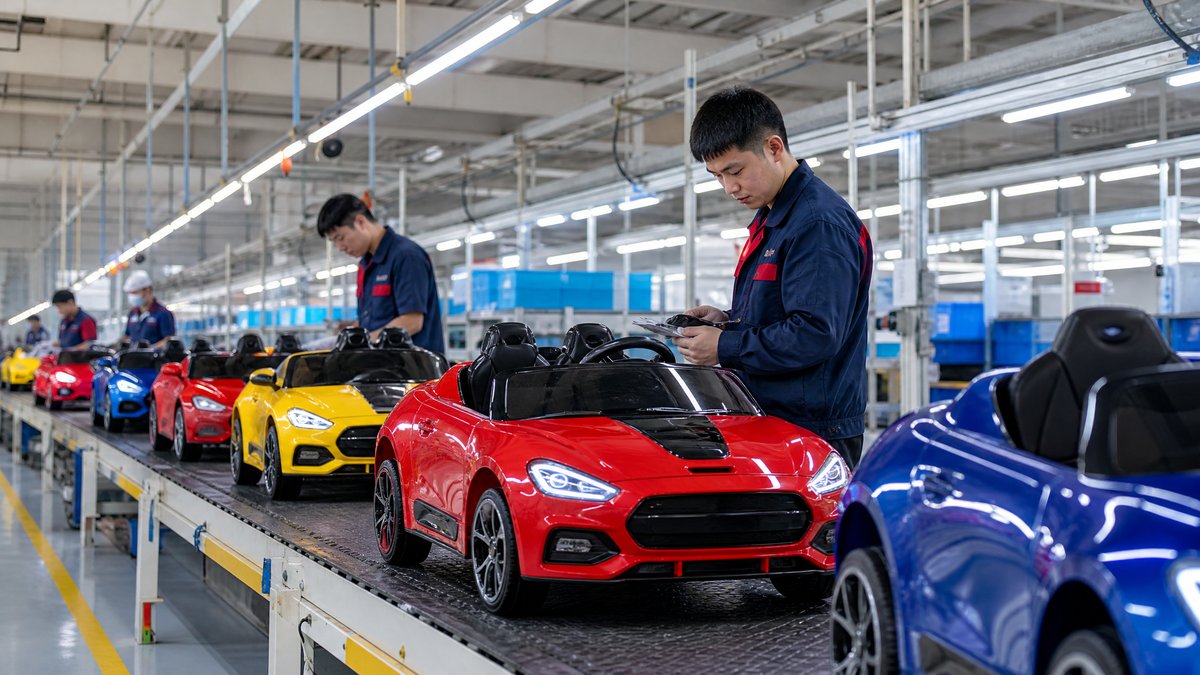
Retailers can build a safer kids electric ride-on car demo program by treating it as a controlled, staff-led experience—not an open play zone. Start with a clearly bounded, dry and obstacle-free route; use a pre-opening vehicle and battery check; keep an adult supervisor in charge; clean and reset the unit between users; manage the queue; and approve the program against the selected model’s instructions, the venue’s rules, insurer requirements, and destination-market obligations.
For importers, wholesalers, distributors, and retail teams, a demo program can make a product easier to understand before purchase. It also introduces operational responsibilities that should be planned before the first customer ride. This guide provides a practical framework, not legal advice or a substitute for the product manual, qualified compliance advice, or local authority requirements.
> Non-negotiable purchasing check: Verify the selected model’s specifications, supplied instructions, labels, battery chemistry and charger information, battery transport rules, and all market requirements for the specific destination market before importing, promoting, or placing a demo unit into service.
Why a controlled demo program is better than a “try it anywhere” display
A ride-on vehicle demo is different from a static product display. Customers may arrive with different ages, sizes, expectations, and levels of supervision. The store also has other shoppers, fixtures, entrances, and staff workflows to protect.
A controlled program gives the retailer a repeatable operating model:
- One defined route instead of unplanned travel through sales aisles.
- One responsible adult supervisor who can decide when a ride starts, pauses, or ends.
- One ready-state process for inspection, cleaning, charging, and documentation.
- One customer flow that keeps waiting families away from the moving area.
- One escalation path for a defect, a spill, an incident, or a policy question.
This approach is designed to reduce avoidable uncertainty. It does not make a program risk-free, and it must be adapted to the model instructions and the local setting.
1. Plan the demo area before choosing the display location
Build a simple, visible route
Select a location that lets the supervisor see the whole route without relying on mirrors, cameras, or another staff member. Mark a start point, a travel path, a turnaround or stop point, and an exit/reset point. Use barriers or clear visual boundaries appropriate to the venue so the route does not blend into general shopper traffic.
The route should be sized around the selected vehicle’s manual, including its intended age range, weight limit, turning behavior, controls, and required clearance. Do not copy the operating assumptions of one model to another. A unit supplied with a parent-control function, for example, still requires a model-specific check that the function is provided, paired, and operating as instructed.
Avoid placing a demo route near:
- Store entrances, automatic doors, escalators, stairs, elevators, loading areas, or emergency exits.
- Display racks, glass, sharp edges, unsecured fixtures, or objects that can fall.
- Loose mats, cables, thresholds, slopes, wet zones, or uneven floor transitions.
- Congested aisles, checkout queues, food-service areas, or areas where pedestrians can unexpectedly cross the route.
Choose a surface you can inspect and maintain
For a retail demo, a level, firm, clean, dry, and unobstructed surface is a sensible baseline. Inspect it before opening and whenever conditions change. Remove spills, loose objects, packing material, and temporary promotional fixtures from the operating zone.
In the United States, OSHA’s walking-working surface rule is a workplace requirement for employers, not a universal customer-demo rule; however, its emphasis on clean, orderly, dry-where-feasible, and hazard-free surfaces is a useful housekeeping reference for retail operators. [OSHA][osha] Confirm which premises, occupational-safety, building, and consumer-safety rules apply where the demo will run.
Separate moving, waiting, and charging spaces
A practical layout separates three functions:
1. Ride zone: the controlled route and supervised boarding point.
2. Queue zone: a marked waiting area outside the vehicle path, with clear sightlines to the briefing point.
3. Service zone: a staff-only place for inspection, cleaning supplies, documentation, and charging when charging is allowed on site.
Do not use the public ride route as a charging or repair area. Keep charging and any troubleshooting away from customer access, following the battery and charger instructions supplied for that model.
2. Put an adult supervisor in charge of every session
The supervisor should own the start/stop decision. A parent or guardian may assist their child, but staff should not assume that a busy family queue can safely self-manage the ride area.
Use a short, repeatable ride briefing
Before each session, the supervisor can confirm the rules shown in the selected model’s instructions and on the retailer’s approved signage. A practical briefing normally covers:
- The applicable user age, size, and weight requirements stated for that model.
- How the child gets in and out, with adult assistance where required.
- Where hands and feet should remain during use, according to the instructions.
- The defined start, route, stop, and exit points.
- No additional riders, no pushing, no chasing, and no entry into the route by waiting customers.
- What the child and guardian should do when the supervisor says “stop.”
Keep the message simple and consistent. If staff cannot clearly supervise the route—for example, during a rush, a spill response, or a staff shortage—pause demos rather than improvise.
Define a stop-and-reset protocol
Train every authorized operator to stop the program for conditions such as a child not following the briefing, a pedestrian entering the route, a surface hazard, unusual vehicle behavior, a loose component, or a battery/charger concern. After a stop, move the vehicle to the reset point, inspect it, clean it if needed, and document/escalate the issue under the retailer’s process before returning it to service.
3. Use a model-specific opening and between-ride checklist
A demo unit should not simply be rolled out and assumed ready. Create a short checklist that staff can complete and retain. The actual items must match the selected model’s documentation; do not infer features, electrical characteristics, or operating limits from a photograph or another SKU.
| Checkpoint | Before opening | Between riders | If the check fails |
|---|---|---|---|
| Route and barriers | Confirm route is clear, boundaries are in place, and floor is clean and dry. | Recheck after a spill, crowding, or layout change. | Stop the program; correct or guard the hazard before reopening the route. |
| Vehicle exterior | Check visible body panels, wheels, seat area, fasteners/guards, and labels for damage, looseness, or missing parts. | Look for new scuffs, loose items, or contamination. | Remove the unit from demo service and follow the supplier/manual process. |
| Controls and functions | Test only the controls and functions specified in the model instructions, in a staff-only test space. | Verify the vehicle is reset and off when appropriate before the next user. | Do not substitute a workaround; isolate and escalate the unit. |
| Battery and connector area | Check for visible damage, loose connections, unusual heat, odor, swelling, leakage, or other abnormalities without disassembling the unit. | Check for any new abnormal signs after use. | Stop using and charging the unit; secure it according to the supplier’s instructions and local procedure. |
| Charger and power area | Confirm the correct supplied/approved charger and cable condition per the manual; keep charging access controlled. | Keep public users away from the service area. | Disconnect only when safe to do so under the instructions; label the equipment out of service and escalate. |
| Hygiene and documentation | Stock approved cleaning materials and open the day’s log. | Clean high-touch points and record exceptions/defects as the retailer’s process requires. | Do not return the unit until it is clean, dry, and cleared for use. |
Battery checks and charging controls
Battery handling deserves its own written procedure because battery type, charger compatibility, transport status, and local rules vary. At a minimum:
- Use the battery and charger configuration specified for the exact demo model; do not mix chargers, packs, or connectors based on appearance.
- Review the manufacturer’s charging, storage, inspection, and end-of-life instructions before deployment.
- Limit battery access to trained, authorized staff and maintain a clear out-of-service process for abnormal units.
- Keep an auditable record of service actions, defects, and battery-related incidents or observations.
- Obtain shipping documentation and confirm the applicable transport classification, packaging, markings, and carrier rules before moving battery-powered units across borders or by air, sea, road, or rail.
For U.S. shipments, PHMSA’s Lithium Battery Guide for Shippers explains that transport requirements depend on the cell/battery type, configuration, and size. [PHMSA][phmsa] It is an official U.S. resource, not a complete global rulebook. Importers and distributors should verify the current destination-market and modal requirements with the relevant regulator, carrier, and qualified dangerous-goods adviser before transport.
4. Clean the demo unit without creating a new hazard
A visible cleaning routine reassures buyers and protects the next user, but it must not introduce moisture or chemical damage. Use only cleaning methods and products compatible with the selected vehicle’s instructions and local hygiene policy.
A workable between-rider routine is to:
1. Move the powered unit to the reset point and ensure it is in the appropriate safe state described by the manual.
2. Wipe high-touch areas such as the steering/control area, seat surface, and handles using a compatible method.
3. Avoid spraying liquids into controls, ports, battery compartments, electrical connections, or labels.
4. Allow surfaces to dry before the next ride.
5. Inspect for lost items, loose parts, or new damage while cleaning.
Set a separate deeper-cleaning schedule for the start/end of each day and after a spill or illness-related concern, in line with the retailer’s local policy. Replace worn cleaning materials and keep the cleaning kit outside the child-accessible ride zone.
5. Control the queue, not just the vehicle
A queue can become the main source of crowding around a good demo setup. Design it deliberately.
Make the customer flow predictable
Use a visible entry point, a short rule sign, a waiting boundary, and a single exit. Offer rides in short, preannounced sessions that staff can end consistently; the duration and capacity should suit the model instructions, venue layout, and supervision resources rather than a generic time target.
Consider a simple queue method appropriate to your store—such as staff-issued turns, a digital waitlist, or a designated line. Whatever method is chosen, do not collect more personal information than necessary, and explain how any information will be handled.
Protect accessibility and retail operations
Keep access routes, emergency egress, checkout circulation, and required accessible paths clear. Do not let the waiting area block another tenant, a neighboring department, or a fire-safety route. Review the layout with the store manager and facility/landlord team before launch, especially for mall, pop-up, exhibition, or multi-tenant locations.
6. Review consent, privacy, venue rules, and market requirements
A demo program may trigger rules that have nothing to do with whether the vehicle operates correctly. Retailers should document a local review before launch and whenever the format or location changes.
Consent and privacy
If the program collects a guardian’s name, email, phone number, photography/video consent, social-media content, or incident information, use a clear lawful process appropriate to the jurisdiction. Explain the purpose, retention, access, and opt-in/opt-out choices required by local policy and law. Obtain any necessary permission before filming or publishing identifiable images of children.
Do not assume that a general purchase form covers event participation, marketing, photography, or a prize drawing. Ask a qualified local adviser when in doubt.
Local policy review
Before operating, confirm the applicable requirements with the relevant parties. The exact list varies by destination and venue, but may include:
- Product safety, labeling, documentation, and importer/distributor obligations.
- The product manual, warranty conditions, and supplier instructions.
- Retailer health-and-safety policies, incident reporting, staff training, and insurance requirements.
- Landlord, mall, exhibition, or event-organizer rules.
- Fire, electrical, building, accessibility, public-space, and consumer-protection requirements.
- Privacy, photography, marketing, and children’s-data rules.
- Battery storage, charging, waste, and transport obligations.
For U.S. consumer-product context, CPSC notes that electrically operated toys have a mandatory requirement under 16 C.F.R. part 1505. [CPSC][cpsc] That reference does not determine compliance in another market or for every product configuration. Verify the selected model’s documents and the complete rules of the destination market with the competent authority or qualified adviser; do not treat a website claim, a generic certificate, or a sample report as a universal approval.
7. Choose a demo format that matches your staffing capacity
The right format is the one your retail team can operate consistently. Use the comparison below as an operational planning tool, not as a regulatory classification.
| Demo format | Suitable when | Key controls to put in place | Escalate or reconsider when |
|---|---|---|---|
| Appointment or assisted demo | Space is limited, the product is premium, or trained staff availability is controlled. | Scheduled handover, model-specific briefing, staff-led route, documented reset. | Staff are pulled away or the requested route cannot be kept clear. |
| Open-hours supervised demo | The store has a fixed, barrier-defined zone and a dedicated supervisor during advertised sessions. | Queue boundary, stop authority, cleaning cadence, condition log, backup coverage. | Footfall makes it impossible to preserve sightlines or keep pedestrians out. |
| Pop-up or event demo | The organizer and venue can approve a temporary layout and operating plan in advance. | Written venue approval, set-up inspection, crowd plan, emergency/incident contacts, transport plan. | Local/event requirements, surface conditions, or staff capability remain unclear. |
A controlled pilot can be useful before rolling out a program across multiple locations. Record how the route performed, where queues formed, which checks generated defects, and which staff instructions needed clarification. Update the operating procedure before expansion.
Internal-link suggestions for this article
Use only links that help a buyer continue the decision process:
- Link the phrase “compare candidate demo models” to the KidsRideCar product lineup, where buyers can review available vehicle categories before requesting model documentation.
- Link “read more buying and retail guidance” to the KidsRideCar Blog.
Avoid adding a model-specific internal link until the exact product page, current manual, and destination-market document set have been confirmed.
Image plan
| Suggested dimensions | Placement | English caption | Alt text | English AI prompt |
|---|---|---|---|---|
| 1600 × 900 px | Below the introduction | “A clearly marked, staff-supervised ride-on car demo route helps keep the customer experience orderly.” | “Retail showroom demo area with a small electric ride-on car, marked route, queue boundary, and adult supervisor.” | “Photorealistic modern family retail showroom, a generic children’s electric ride-on car on a clearly marked indoor demo route, one adult staff supervisor at the start point, barrier-defined queue area, clean dry level floor, neutral signage with no readable brand names, wide horizontal composition, professional B2B retail safety mood.” |
| 1400 × 900 px | In the demo-area planning section | “Separate the ride route, customer queue, and staff-only service area.” | “Top-down retail floor plan showing separate ride, queue, and service zones for a children’s ride-on car demo.” | “Clean editorial vector illustration, top-down floor plan for an indoor kids electric ride-on car retail demo, distinct labeled zones for Ride Route, Waiting Queue, and Staff Service Area, arrows for customer flow, accessible clear pathways, simple blue and charcoal palette, English labels, no logos, 16:10.” |
| 1400 × 933 px | In the checklist/battery section | “A documented pre-opening check helps staff identify a unit that should remain out of service.” | “Store employee inspecting a generic children’s electric ride-on car and completing a pre-opening checklist.” | “Photorealistic close-medium shot of a retail employee in a clean staff service area inspecting a generic children’s electric ride-on car, clipboard checklist, charger stored safely in background, no exposed battery internals, no brand marks, calm professional lighting, landscape composition.” |
| 1600 × 900 px | Before the conclusion | “A simple briefing and managed queue make demos easier to supervise.” | “Adult store supervisor briefing a guardian and child beside a marked ride-on car demo queue.” | “Photorealistic retail scene, adult store supervisor giving a brief safety explanation to a guardian and child beside a generic electric ride-on car, clear queue markers and empty demo path visible, child is accompanied by guardian, no logos or readable text, welcoming but controlled atmosphere, wide landscape.” |
FAQ: Safe Kids Electric Ride-On Car Retail Demos
1. Can a retailer let children test ride-on cars anywhere in the store?
It is better to use a designated, supervised route rather than general aisles. The final decision should follow the selected model’s instructions, the store’s risk assessment and policies, the venue’s approval, and applicable local requirements. If the route cannot be kept clear and supervised, pause the demo.
2. How often should a demo ride-on car be checked?
Use a documented pre-opening check, a short reset/condition check between riders, and an additional check after a spill, impact, unusual behavior, or layout change. The content of each check must be based on the exact model’s instructions and the retailer’s procedures.
3. What should staff do if the battery area looks damaged or unusual?
Take the unit out of demo service and do not continue using or charging it. Follow the manufacturer’s instructions and the retailer’s escalation process, and obtain qualified assistance where required. Do not attempt an unapproved repair or assume a different charger or battery will be suitable.
4. Do parents need to sign a consent form for a demo?
It depends on the jurisdiction, venue, activity, data collection, photography, and retailer policy. A store should not assume that a waiver or generic form is sufficient. Obtain local legal and policy guidance, particularly if you collect personal data or create promotional images involving children.
5. Do imported ride-on cars need the same documents in every country?
No. Requirements can differ by product configuration and destination market. Before ordering or demonstrating a product, verify specifications, instructions, labels, certificates/test documentation where applicable, battery transport rules, and importer/distributor obligations for the exact model and destination market.
Build confidence with a program your team can repeat
A well-run demo program is a retail operating system: a defined route, active adult supervision, a clean and inspected vehicle, controlled battery handling, a managed queue, and documented local approval. The aim is not to make broad safety promises; it is to give staff a practical, repeatable way to decide when a demo can proceed and when it must stop.
If you are selecting models for a showroom, pop-up, distribution program, or retail rollout, email KidsRideCar for model documentation and wholesale discussion. Confirm the exact model, intended destination market, and demo environment before finalizing your plan.
For help aligning your product shortlist with a controlled demo concept, contact the KidsRideCar team. Ask for the current model-specific information you need to complete your own compliance and operational review.
[cpsc]: U.S. Consumer Product Safety Commission (CPSC), “Toy Safety Business Guidance” — verified for the statement that electrically operated toys have a mandatory requirement under 16 C.F.R. part 1505.
[osha]: Occupational Safety and Health Administration (OSHA), 29 C.F.R. § 1910.22, “General requirements” — verified for U.S. workplace surface requirements addressing clean, orderly, sanitary, dry-where-feasible, and hazard-free walking-working surfaces.
[phmsa]: U.S. Department of Transportation, Pipeline and Hazardous Materials Safety Administration (PHMSA), “Lithium Battery Guide for Shippers” — verified for guidance that transport requirements vary by lithium cell/battery type, configuration, and size.
Official references
Explore these external resources for current regulatory and trade guidance. Confirm requirements with the relevant authority before placing an order.
Ready to Start?
Factory-Direct · CE & ASTM Certified · MOQ from 50 Units
Our export team works with buyers in 60+ countries. Get a quote within 24 hours.
KR
Written by KidsRideCar
China's leading kids electric ride-on car manufacturer. 500,000+ units shipped annually to 60+ countries. CE, ASTM & EN71 certified.