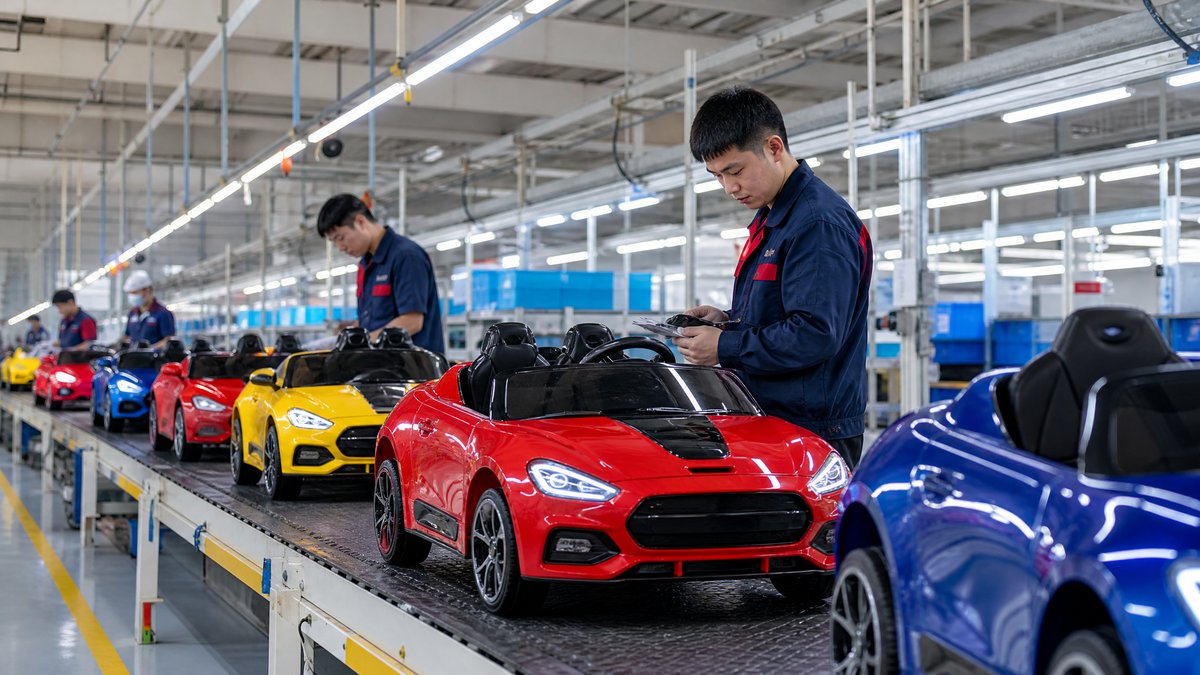
Retailers should create kids ride-on car product photography as a structured buying aid, not as a collection of attractive pictures. The best image set shows the actual product, its scale, included components, controls, finish, use environment, packaging, and safety-relevant details clearly enough for a parent or trade buyer to make an informed decision. Before a shoot, the retailer should confirm the exact model and configuration, prepare a channel-specific shot list, photograph the product from consistent angles, add measured or labeled detail images where useful, and approve every claim against supplier documentation.
This approach matters for overseas importers, wholesalers, distributors, rental operators, and OEM buyers as well as direct-to-consumer stores. A carefully planned image library can support a product page, marketplace listing, wholesale catalog, sales presentation, dealer portal, and [inquiry workflow](/inquiry) without requiring a different shoot for every channel.
Why product photography matters for a ride-on car retailer
A kids ride-on car is a relatively large, feature-rich product. A single front-facing image cannot answer common buyer questions such as:
- How large is the vehicle compared with a child or a room?
- Is it a one-seat or two-seat configuration?
- What controls and accessories are included in this specific version?
- How do the doors, hood, storage area, steering wheel, or seat appear?
- Is the pictured color and trim the same as the stock-keeping unit (SKU) being offered?
- What arrives in the carton, and which assembly steps remain for the customer?
Strong photography reduces uncertainty before checkout, quotation, or purchase-order approval. It also helps sales teams explain differences between models without relying on vague phrases such as “premium” or “heavy duty.” Images cannot replace a specification sheet or destination-market review, but they can make the available information easier to understand.
For a retailer sourcing from a factory, photography is also a configuration-control tool. If a sample has a different wheel, seat, light, dashboard, battery compartment cover, or decal than the approved version, resolve the mismatch before publishing. See the related [kids ride-on car product catalog guide](/blog/how-to-build-kids-electric-ride-on-car-product-catalog-b2b) and [KidsRideCar product range](/products/) for broader planning.
Start with a model and configuration brief
Do not begin with “take some nice photos.” Begin with a written brief tied to a model code or purchase-order line. Record the product name, variant, color, licensed or unlicensed branding status, voltage or power configuration as supplied, seat arrangement, included accessories, packaging version, and intended sales channels. If the supplier offers several configurations, list exactly which one is being photographed.
Ask the factory or OEM team to confirm:
1. Which sample corresponds to the sellable configuration.
2. Which parts are standard, optional, or unavailable in the target order.
3. Which logos, trademarks, decals, and colors are approved for the retailer’s market.
4. Which specifications may be published and which require verification after inspection.
5. Whether images may be used by the retailer, distributor, dealer, or marketplace account.
6. Whether the final production version may differ from the sample and how changes will be communicated.
This prevents a common procurement problem: a listing shows an upgraded sample while the quotation covers a simpler configuration. If a retailer plans private-label or [OEM customization](/blog/oem-kids-electric-ride-on-cars-customization-guide), approve the image brief after branding placement, packaging, and component changes are defined.
Build a complete shot list
A useful image set normally combines clean studio-style views, detail images, scale references, and practical-use context. The exact number depends on the channel, but the coverage should answer buyer questions rather than fill a preset gallery.
1. Hero and orientation views
Create a primary image with the vehicle fully visible, unobstructed, and presented against a simple background. Add front, rear, left, right, and three-quarter views. Keep the camera height, lighting direction, and product position consistent so buyers can compare variants in a collection grid.
Show the vehicle with doors, hood, trunk, mirrors, and other movable exterior parts in their normal closed position in the main gallery. Use separate images for open positions. Avoid cropping wheels, handles, steering controls, or other features that affect the product’s apparent size.
For a wholesale catalog, include a labeled model code or filename convention rather than placing promotional text over the product. For a marketplace, follow its rules for main images and overlays.
2. Feature and control details
Photograph details that buyers commonly ask about: seat layout, seat belt or restraint component where supplied, steering wheel, dashboard, buttons, gear selector, pedal area, parental remote control where included, lights, wheels, tires, charging port location, and storage features. Use close-ups that are sharp enough to show shape and finish without implying a feature that is not included.
If a remote control is an optional item, photograph it separately and label its status in the listing. Do not present optional accessories as standard equipment. The same rule applies to decorative decals, upgraded wheels, music functions, or special trim.
3. Scale and dimensions
A product image should not be used to guess dimensions. Publish verified measurements in the specification area and use a scale image only as a visual aid. A child, adult, doorway, garage, showroom aisle, or neutral room can help communicate proportion, but the image must not imply a recommended age, weight limit, riding surface, or supervision arrangement unless those details have been verified for that model and destination market.
For B2B buyers, photograph the vehicle beside a neutral measurement reference when practical, or provide a separate dimension diagram. Keep perspective controlled: a wide-angle lens close to the product can make the vehicle look larger than it is.
4. Packaging and included contents
Importers and distributors need images of the carton, protective materials, manuals, charger, remote, small parts, and assembly components. Photograph an opened package only when the contents are confirmed for the exact SKU. A flat lay can be useful, but it should be accompanied by a written included-items list.
Do not use a packaging image to make an unverified claim about shipping strength, drop performance, or regulatory compliance. Packaging may change by destination, order quantity, or private-label program. Link the image set to the relevant [packaging and export planning guide](/blog/kids-electric-ride-on-car-packaging-guide-amazon-fba-retail) when preparing internal procurement materials.
Photograph safety-relevant details without making legal claims
Safety-oriented images should be factual and model-neutral. Show guards, rounded exterior areas, seat restraints, wheel clearance, charging labels, warning labels, and control layouts when they are present on the approved sample. Keep labels legible, but do not edit, remove, or rewrite a warning to make the image look cleaner.
Photography does not prove compliance. Requirements vary by destination market, product classification, age range, battery type, electrical configuration, and intended use. A retailer should ask the supplier for the documentation relevant to the destination and configuration, then obtain appropriate professional or laboratory advice where necessary. Do not place a certification mark, test statement, or safety claim in an image unless its use and scope have been verified.
Avoid staged scenes that show unsafe behavior, such as riding near traffic, on stairs, in water, or without required adult supervision. A lifestyle image should communicate the intended setting without turning a visual pose into an operating instruction. Keep model-specific warnings in the product copy and manual, not only in a caption or graphic.
Use a repeatable production setup
Consistency is more valuable than theatrical styling. Use a clean background for the hero set, even lighting that reveals body lines and surface finish, and enough negative space for channel cropping. Photograph the vehicle at the same lens height and distance across a product family. Capture a color reference and retain the original files so the retailer can address a color dispute without relying on a compressed marketplace image.
For lifestyle photos, choose a realistic environment that matches the sales proposition: a showroom, home setting, rental venue, or outdoor area where the product is intended to be considered. Keep the background uncluttered. If people appear, obtain the necessary permissions and avoid making the child the focus of a claim about performance or suitability.
Create two deliverables from each approved shoot:
- Master library: high-resolution originals, retouched files, detail crops, dimension diagrams, and usage notes.
- Channel exports: correctly sized and compressed versions for the retailer’s store, marketplaces, dealer portal, ads, social media, and sales PDFs.
Use descriptive filenames such as `model-code_front_white-background_v01.jpg` and maintain a simple image register. The register should record model code, configuration, date, photographer or source, approval status, usage rights, and any limitation on the image.
Adapt the image set to the sales channel
A direct-to-consumer page usually needs a clean hero image, a sequence of angles, feature details, dimensions, packaging or contents, and a restrained lifestyle image. A wholesale buyer often needs a model comparison sheet, carton view, component details, color options, and a clear link between images and SKU codes. A rental operator may prioritize fleet consistency, control layout, charging access, visible wear points, and service documentation, but should not infer durability from appearance alone.
Distributors should request a reusable image package with permission to crop and localize captions. OEM buyers should separate “approved for presentation” images from “approved for production.” A pre-production render or sample can be useful for concept review, but it should not be published as a photograph of finished inventory.
When localizing for overseas markets, translate captions and alt text accurately while keeping model codes and measured specifications consistent. Do not add a local compliance symbol or market-specific claim merely because the image is being used in a new country.
Create an approval checklist before publishing
Before an image goes live, compare it with the approved product record. Check the following:
- The model, color, branding, and seat configuration match the sellable SKU.
- Included and optional accessories are clearly separated.
- The image does not hide a visible defect, warning, label, or required control.
- Perspective does not exaggerate dimensions or ground clearance.
- Retouching preserves the real finish, seams, controls, wheels, and labels.
- Any people, logos, locations, and third-party assets have appropriate usage permission.
- The image does not state or imply an unverified certification, test result, price, delivery promise, or performance figure.
- Alt text describes what is visible rather than stuffing keywords.
- The retailer can identify the source file and the date of approval.
Have merchandising, procurement, and—where relevant—quality or compliance reviewers sign off separately. Procurement confirms configuration; merchandising confirms clarity and channel fit; compliance reviewers check whether the presentation creates a regulated or safety-related implication.
Procurement example: turning a photo request into a supplier brief
Suppose a distributor is comparing three ride-on car variants for a seasonal assortment. Instead of asking a factory for “catalog pictures,” the distributor can request one approved sample per model, front and rear views, all sides, dashboard and seat details, remote and charger images where included, open-door views, a carton-and-contents view, verified dimensions, and a model-coded image register. The distributor can then identify which images are shared across the range and which belong only to one configuration.
If the retailer later changes color or branding, it should request a new approval set for the changed areas. It should not assume that an old lifestyle image remains accurate. This process reduces listing corrections and gives the buyer a useful evidence trail without inventing a test result or promising a particular production outcome.
Frequently Asked Questions (FAQ)
How many photos should a kids ride-on car listing have?
Use enough images to answer questions about identity, scale, controls, included items, dimensions, and finish. The right number depends on the marketplace and product complexity. A smaller, accurate gallery is better than a larger gallery that repeats angles or shows optional equipment as standard.
Should retailers use lifestyle photos or white-background photos?
Use both when the channel allows it. White-background images make comparison and product identification easier; lifestyle images communicate scale and context. Neither should replace verified specifications, operating instructions, or destination-market compliance review.
Can a supplier’s existing catalog photos be reused?
Only after confirming that the photos show the exact configuration and that the retailer has permission to use them. Ask whether the images contain licensed branding, optional accessories, old packaging, or a pre-production sample. Record the approved usage and replace images when the product changes.
How can photography reduce returns?
Show the product from enough angles to set realistic expectations, publish verified dimensions, display included accessories separately, and identify assembly or packaging contents accurately. Photography cannot eliminate returns, but it can reduce confusion about size, finish, controls, and configuration.
Should safety information be added as text inside the image?
Use text overlays sparingly and only for accurate, approved information. Keep essential warnings, supervision guidance, charging instructions, and model-specific limits in the product copy and documentation as well. Requirements vary by destination market and configuration, so obtain a suitable review before publishing safety-related claims.
Conclusion
Retailers create effective kids ride-on car product photography by connecting every image to a verified model, a real buyer question, and a specific sales channel. Start with a configuration brief, capture hero views and decision-making details, show scale without exaggeration, separate standard from optional items, preserve safety labels, and approve the final library against procurement records. The result is not merely a better-looking listing: it is a reusable content asset for import, wholesale, distribution, rental, OEM, and retail decisions.
For help defining a model-specific content brief or preparing a wholesale image request, [contact KidsRideCar](/inquiry) or email info@kidsridecar.com. Include the target market, model or configuration, sales channels, and the image details your buyers need.
Official references
Explore these external resources for current regulatory and trade guidance. Confirm requirements with the relevant authority before placing an order.
Ready to Start?
Factory-Direct · CE & ASTM Certified · MOQ from 50 Units
Our export team works with buyers in 60+ countries. Get a quote within 24 hours.
KR
Written by KidsRideCar
China's leading kids electric ride-on car manufacturer. 500,000+ units shipped annually to 60+ countries. CE, ASTM & EN71 certified.