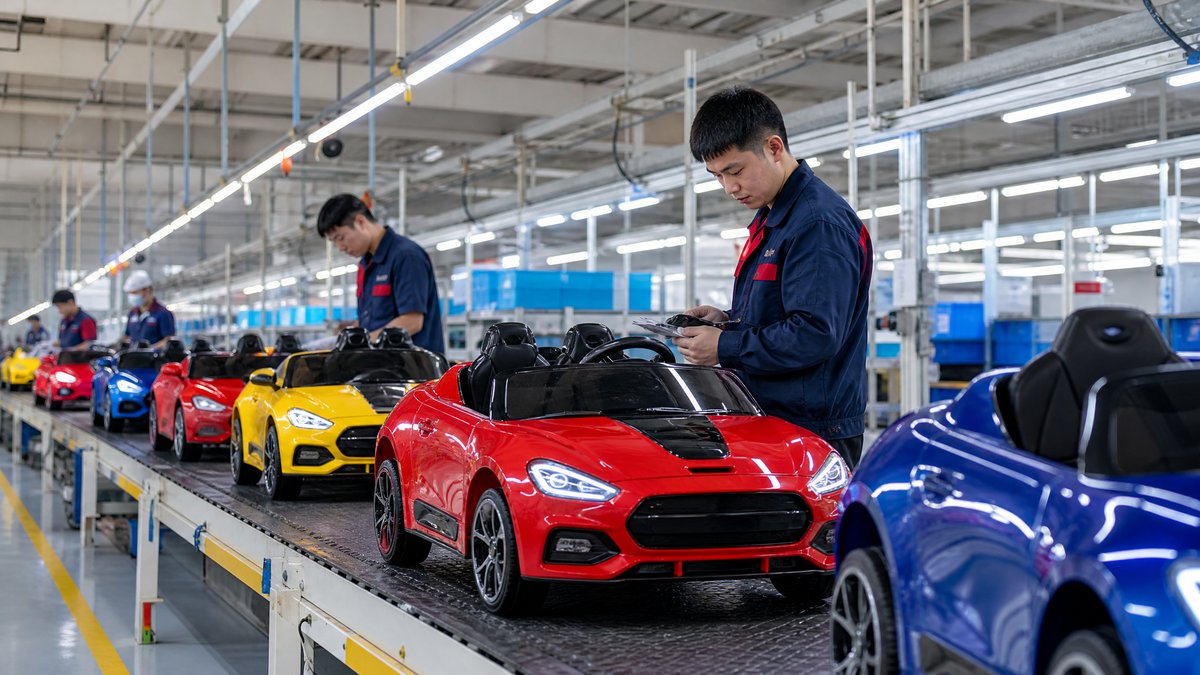
Dealers can improve kids ride-on car retail displays by making the buying decision easier at every step: attract attention from a distance, organize models by meaningful differences, show the product at a safe and useful level, and give shoppers accurate information without clutter. The strongest display is not necessarily the largest one. It is a display that helps a parent, retailer, rental operator, or purchasing manager quickly understand which model fits the intended user, location, budget, and operating plan.
For overseas importers, wholesalers, distributors, and OEM buyers, display planning should begin before the purchase order. Product dimensions, display samples, signage files, and demonstration requirements can affect the retail experience. Treat merchandising as part of the product program rather than as a last-minute store decoration exercise.
Start with the customer decision, not the available floor space
A common mistake is to place every available model in one row and expect shoppers to compare them unaided. A better approach is to identify the questions customers ask first and build the display around those questions.
Typical questions include:
- Is this model suitable for the child’s age and size according to the product information?
- Is it intended mainly for indoor, outdoor, home, retail-event, or rental use?
- Does it have one seat or two seats?
- Does it use a parental remote, and what controls are available to the child?
- How is it charged and stored?
- What assembly, care, and after-sales information will the buyer receive?
The exact answers must come from the model’s approved documentation. A display should never imply suitability, speed, load capacity, operating time, or safety performance that has not been verified for that configuration and destination market.
Use the answers to create simple display zones. For example, a dealer might group products by “compact home use,” “two-seat family use,” and “higher-visibility feature models,” provided the labels accurately reflect the range. This approach is more helpful than arranging cars only by color or brand license.
Build a clear model hierarchy
Retail displays work better when shoppers can see a deliberate good-better-best or use-case progression without being pushed toward unsupported claims. The hierarchy can be based on documented differences such as seat count, body style, included controls, finish options, or accessory compatibility.
Put a hero model at the entry point
Choose one model to introduce the category. It should be visually distinctive, easy to approach, and supported by a concise information panel. The hero model does not have to be the highest-priced item. Its job is to communicate what the category offers and guide the shopper toward the next comparison.
A dealer sourcing a mixed shipment could request one assembled display unit per selected model family, then use a consistent panel beside each unit. An importer may also ask the factory for approved product photos, dimensions, assembly information, and feature wording before printing signs. This reduces the risk that a salesperson or designer fills gaps with assumptions.
Limit visual competition
Too many shapes, colors, signs, and accessories can make a large display feel confusing. Keep a consistent visual system: one headline, a short benefit or use-case description, a compact specification block, and a clear next step such as “Ask for a guided demonstration” or “Request a quotation.”
If the store carries many models, display a representative sample and use a catalog or QR code for the remaining range. Link digital shoppers to the relevant [KidsRideCar products](/products/) page rather than placing every specification on a small sign.
Make product information easy to scan
A retail sign should answer the first comparison questions quickly. Avoid turning it into a technical manual. Use a consistent template for every model so shoppers can compare like with like.
Useful fields may include:
- Model name or reference
- Recommended user information as supplied for that model
- Number of seats
- Power system information, stated exactly as approved
- Control options, such as child controls and parental remote where included
- Product dimensions and approximate display footprint
- Included items and notable compatible accessories
- Charging, storage, and care reminders
- A QR code or short URL for the full product page and inquiry channel
Do not copy a generic specification across an entire range. A change in battery configuration, control system, body style, or included accessory can make a sign inaccurate. Dealers should maintain a version-controlled product information sheet and have the manufacturer confirm model-specific details before launch.
For B2B buyers, add a discreet trade information layer where appropriate. A distributor may need carton dimensions, packaging format, spare-parts availability, and private-label options. These details can sit in a trade binder, staff tablet, or QR-linked wholesale page rather than overwhelming a consumer-facing display.
Use demonstrations to explain, not to encourage uncontrolled play
A functioning display can help customers understand controls, sound, lighting, steering, and the general user experience. However, demonstrations need a written store procedure. The product should be operated only in the conditions and manner supported by its instructions and by the dealer’s local risk controls.
Keep demonstration units in a defined area with a clear boundary. Prevent trips around cables, chargers, packaging, and display plinths. Use a staff-led process rather than leaving a powered unit available for unsupervised use. A staff member should explain the controls, confirm the demonstration environment is appropriate, and stop the demonstration if the area becomes crowded or conditions change.
Do not demonstrate on stairs, near traffic routes, wet or uneven surfaces, or any location that creates a foreseeable hazard. Follow the product instructions for charging and operation. Do not alter electrical or battery systems, remove protective features, or attempt internal repairs. Questions about faults should go through the approved after-sales process.
A non-powered “look and feel” display can be useful when the store cannot provide a controlled demonstration area. Show the seat, access points, controls, storage requirements, and packaging information while directing customers to the user instructions for operation.
Design the display around comparison moments
A shopper rarely decides from one isolated product. Create a comparison path that answers “why this model instead of that one?” without making unsupported superiority claims.
Use a comparison card
A simple card can place two or three models side by side across the same fields: seat count, control type, body style, intended setting, dimensions, and included features. Mark unavailable or model-specific information clearly rather than leaving blank spaces that staff may fill inconsistently.
For example, a family retailer could compare a compact single-seat model with a two-seat model and a feature-focused model. The card should explain the practical difference—such as available seating or display footprint—while directing the buyer to the full product documentation for details. It should not claim that one model is universally safer, faster, stronger, or more durable without evidence applicable to the exact configuration.
Show the footprint honestly
Ride-on cars occupy meaningful retail space and may need room for customers to approach them. Mark the approximate product footprint on the floor or plinth, keep access paths open, and show how the unit is stored when it is not on display. This helps dealers plan replenishment and helps B2B visitors assess whether a model suits their own stores, rental venues, or event spaces.
For a distributor preparing a retailer kit, provide a simple planogram option for a small store and another for a larger showroom. The layouts should be adaptable to local accessibility, fire-safety, electrical, and landlord requirements rather than presented as universal legal advice.
Add merchandising assets to the procurement brief
Display quality often depends on what the supplier provides before the shipment leaves the factory. Include display requirements in the product brief or OEM discussion instead of treating them as an afterthought.
Ask for:
- High-resolution product images on a consistent background
- Approved model names and feature descriptions
- Product dimension drawings and display footprint information
- Assembly, charging, storage, and care instructions
- Product labels and destination-market documentation requirements
- Retail sign templates that can be localized
- QR-ready URLs for product pages, manuals, and inquiries
- Packaging photographs and carton handling information
- Spare-part and after-sales reference information for staff
- Options for display samples, demo units, or non-powered showroom units
The final package should match the ordered configuration. If an OEM buyer changes the battery, seat, remote, color, accessory bundle, or branding, the artwork and product documents should be reviewed again. Ask the supplier which files are approved for consumer use and which are intended only for trade communication.
You can use a [product inquiry](/inquiry) to give the supplier a structured request covering models, destination markets, display assets, packaging, and OEM requirements.
Train staff to use the display consistently
Even a well-designed display fails when each salesperson explains it differently. Create a short product briefing for staff covering the approved facts, questions to ask, and claims to avoid.
A useful conversation sequence is:
1. Ask who will use the product and where it will be operated.
2. Confirm the customer’s preferred seat arrangement, style, and control expectations.
3. Point to the relevant model group and explain only documented differences.
4. Explain demonstration rules, charging, storage, and care at a high level.
5. Provide the manual, product page, or inquiry route for detailed questions.
6. Record questions that the current display does not answer and improve the information set.
Train staff to say “I will verify that for this model and market” when information is uncertain. This is better than guessing about age grading, legal compliance, charger suitability, water exposure, warranty coverage, or shipping restrictions.
Make the display useful for retail, rental, and wholesale visitors
Different commercial buyers use the same display in different ways. A retailer may care about shopper appeal, footprint, packaging, and returns. A rental operator may focus on controlled operation, cleaning, charging routines, storage, and replacement support. A wholesaler or distributor may need consistent model data, packaging information, and marketing assets for downstream accounts.
Create separate information layers without creating separate claims. A small “trade notes” section can point to operating procedures, service contacts, replacement-part information, and bulk inquiry support. For rental operators, demonstrate how staff can inspect the unit before and after use according to the supplier’s instructions. For importers, provide a document checklist that can be reviewed with the relevant logistics and compliance teams.
Requirements vary by destination market and configuration. Dealers should confirm applicable product, labeling, electrical, battery transport, age-grading, and documentation requirements with qualified local advisers, authorities, testing providers, or their importer-of-record team. A retail display is not a substitute for required technical files or market checks.
Measure display quality with practical signals
Dealers do not need invented conversion figures. Use simple operational observations:
- Which questions do shoppers ask repeatedly?
- Which model groups attract attention but do not lead to a conversation?
- Where do visitors hesitate or block the aisle?
- Which signs are ignored, hard to read, or frequently corrected by staff?
- How often do customers request information that is not available?
- Which demonstration steps create delays or safety concerns?
- Which display units need cleaning, charging, or repair attention?
Review the display after a defined selling period and make one change at a time where possible. Replace unclear wording, move the comparison card, adjust the hero model, or simplify the QR path. Document the change so the distributor or supplier can reproduce the improved version at other locations.
FAQ: Improving kids ride-on car retail displays
What should be shown on a kids ride-on car retail display?
Show the model name, accurate model-specific specifications, seat count, control options, dimensions, intended-use information, included items, care or charging reminders, and a route to the full product page or inquiry team. Keep the headline concise and make detailed documentation available through a QR code, staff tablet, or printed guide.
Should dealers display working ride-on cars or static units?
Either can work. A working unit can explain controls and user experience when the dealer has a controlled, staff-led demonstration procedure and a suitable area. A static unit may be preferable where space, supervision, electrical access, or store traffic makes operation impractical. In both cases, follow the product instructions and do not modify the unit.
How many models should a dealer place on the sales floor?
There is no universal number. Select enough models to represent the store’s priority use cases and documented product differences, while preserving clear access and comparison. A smaller, coherent range with accurate information is often more useful than a crowded display. Use a catalog or digital product page to show additional models.
What should an importer request from a supplier for display support?
Request approved product data, images, dimensions, manuals, labels, display artwork, QR destinations, packaging information, and after-sales references for the exact ordered configuration. Confirm which assets can be localized and ask for a review whenever a model or accessory changes.
Conclusion
Better kids ride-on car retail displays are built around buyer clarity. Start with the questions customers ask, organize models by meaningful differences, present accurate information, control demonstrations, and include display assets in the sourcing brief. Then use staff feedback and recurring questions to improve the display over time.
For importers, wholesalers, distributors, retailers, rental operators, and OEM buyers, this approach turns a showroom unit into a practical sales and procurement tool without unsupported claims. Explore the [KidsRideCar product range](/products/) or [contact KidsRideCar](/inquiry), or email info@kidsridecar.com, to discuss models, display materials, OEM requirements, and market-specific documentation.
Official references
Explore these external resources for current regulatory and trade guidance. Confirm requirements with the relevant authority before placing an order.
Ready to Start?
Factory-Direct · CE & ASTM Certified · MOQ from 50 Units
Our export team works with buyers in 60+ countries. Get a quote within 24 hours.
KR
Written by KidsRideCar
China's leading kids electric ride-on car manufacturer. 500,000+ units shipped annually to 60+ countries. CE, ASTM & EN71 certified.