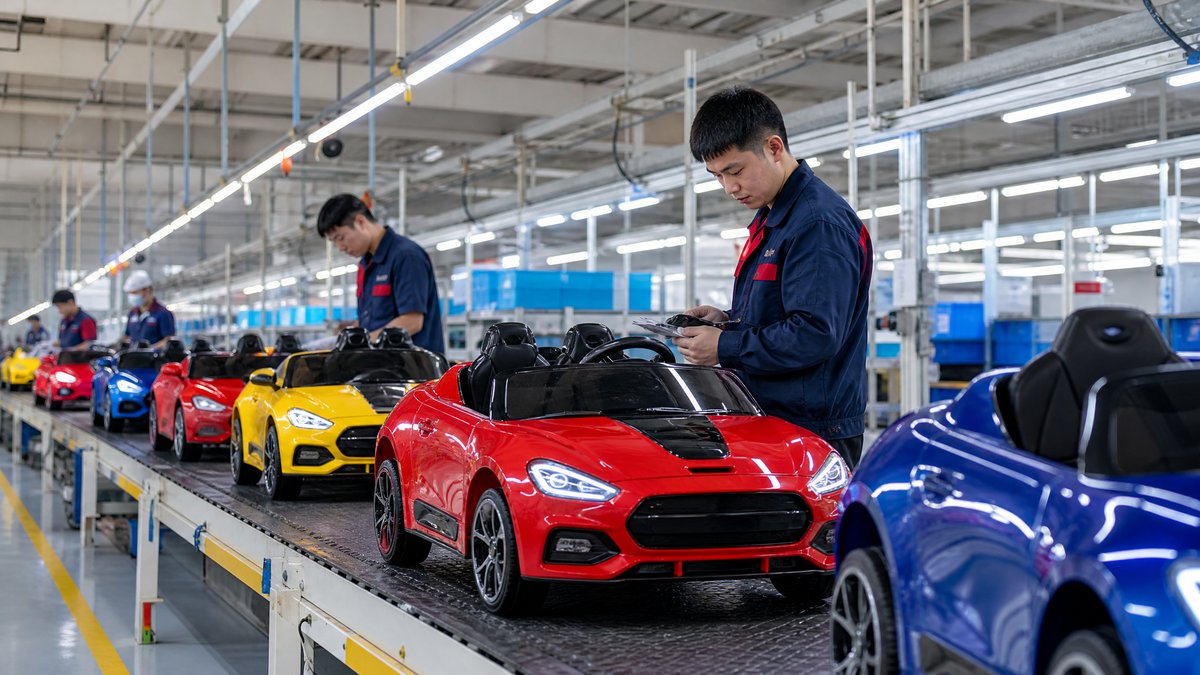
Dealers can organize kids ride-on car demonstration equipment by creating a model-based demo station, separating display units from consumable accessories, labeling every component, using a repeatable pre-demo checklist, and assigning responsibility for inspection, charging, cleaning, and storage. The goal is not to put every available accessory on the sales floor. It is to make each demonstration clear, controlled, safe, and easy for staff to repeat.
For overseas importers, wholesalers, distributors, retailers, and OEM buyers, demonstration equipment is also a commercial asset. A well-organized kit helps a dealer present differences between models, answer product questions consistently, reduce missing-part problems, and send useful feedback to the supplier. Dealers should confirm model-specific instructions and product documentation with the supplier before putting any unit into service.
What equipment should a kids ride-on car dealer organize?
A practical system normally includes five groups of equipment. The exact contents depend on the model, the store format, and the demonstration method.
1. Demonstration vehicles
Keep one clearly identified unit for each model or product tier that customers need to compare. For example, a dealer may allocate:
- One compact single-seat model for an entry assortment
- One larger or two-seat model for family buyers
- One model with a parental remote control when that feature is part of the range
- One OEM or private-label sample when the dealer is presenting a custom program
Use the supplier’s model number, color, voltage designation, and revision information on the unit record. Do not rely only on a retail name, because similar-looking products can have different controls, chargers, or manuals.
A dealer does not necessarily need one live unit for every SKU. A representative demonstration fleet can support a broader catalog if the sales team has accurate product sheets and can explain which features vary by model. Link each live sample to the relevant [kids ride-on car product range](/products/kids-electric-ride-on-cars) and its documentation.
2. Power and charging equipment
Store each charger or power adapter with the correct vehicle. Use a durable label showing the matching model or sample ID. A charger should not be treated as a universal accessory merely because the connector appears similar. Staff should follow the supplied charging instructions and avoid using unapproved substitutes.
Create a charging shelf or cabinet away from customer traffic. Keep charging areas dry, ventilated, and free of loose packaging, liquids, and trip hazards. If a unit has a rechargeable battery, staff should use only the manufacturer’s stated process. They should never open a battery, alter wiring, solder connections, or attempt an internal repair.
A simple charging log can record the unit ID, date, staff initials, and any visible issue reported during or after charging. The log is an operational control, not a claim about runtime or performance.
3. Demonstration accessories
Separate accessories into three categories:
- Installed features: items that remain on the vehicle, such as a seat belt, dashboard controls, lights, or a remote-control receiver, when supplied with that model.
- Customer-handled accessories: items such as a parental remote control, key, steering wheel, or detachable music-control component that staff may show during a demonstration.
- Service and presentation items: cleaning cloths, approved labels, display stands, floor protection, spare documentation, and cable organizers.
Place customer-handled items in a labeled tray or compartment. If an accessory is model-specific, write the vehicle ID on its storage label. This avoids a common dealer problem: a remote or charger being returned to the wrong sample after a busy demonstration.
Do not add aftermarket accessories to a live demonstration if they could change the vehicle’s operation or create uncertainty about what is included in the sale. If a dealer displays an optional item, mark it clearly as optional and list the applicable model compatibility.
4. Information and sales materials
A demonstration is more useful when customers can connect what they see to a buying decision. Prepare a compact information pack for each unit containing:
- Model name and supplier or internal SKU
- Recommended user information as stated in the product documentation
- Dimensions, seat configuration, and stated load information from the approved specification
- Included accessories and assembly requirements
- Charging and storage instructions
- Warranty and after-sales contact procedure
- Safety warnings and supervision guidance
- QR code or link to the matching product page or [inquiry form](/inquiry)
Avoid handwritten claims that are not supported by the supplier’s approved materials. Do not promise a delivery date, certification outcome, operating range, or performance figure unless the dealer has verified that information for the specific model and market.
5. Maintenance and housekeeping supplies
Keep a small, controlled set of non-invasive supplies near the display: a clean microfiber cloth, a waste container, floor markers, cable ties or organizers, approved signage, and a checklist clipboard or digital form. For a vehicle with visible dirt or fingerprints, cleaning the exterior can improve presentation. Cleaning supplies should not be used to modify, lubricate, or disassemble internal components.
How should dealers design the demo area?
Start with the customer journey rather than the equipment list. A practical demo area usually needs four zones:
1. Approach zone: clear space where a customer can view the product without stepping over cartons or cables.
2. Information zone: a product card, feature summary, safety notice, and price or quotation process if applicable.
3. Controlled demonstration zone: a defined surface suitable for the dealer’s planned demonstration and large enough for staff to maintain control.
4. Storage and charging zone: a staff-access area for chargers, remotes, manuals, cleaning supplies, and inspection records.
Keep public and staff equipment visually distinct. For example, use one color of label for live display units and another for boxed stock or service items. A simple floor plan can show where each model belongs when the store opens and where it returns after use.
The demonstration surface should match the intended activity and supplier guidance. Staff should avoid presenting a ride-on car on stairs, near vehicle traffic, around water, or in another uncontrolled area. Model-neutral safety guidance should always include active adult supervision, use of the supplied safety features, and compliance with the product instructions.
How can dealers organize equipment by model and feature?
Use a sample ID that is shorter than the full SKU but still traceable. A format such as DEMO-01, DEMO-02, and DEMO-03 is easy for staff, while a separate record stores the exact model and revision. Put the ID in at least two places: on the vehicle and on the accessory tray.
Create a one-page equipment matrix with columns for:
- Demo ID
- Exact model and color
- Product category or price tier
- Included charger or adapter ID
- Remote-control ID, if applicable
- Manual and warning-label version
- Display location
- Last inspection date
- Current status: ready, charging, hold, or service review
This matrix is especially useful for a distributor that operates several retail branches. It gives the sales team a common reference and makes it easier to transfer a demo unit without losing its accessories or documentation. For OEM buyers, it also creates a practical record of which prototype or approved sample is being shown.
What should a pre-demonstration checklist include?
A short checklist is more likely to be used than a long technical form. Before each customer-facing session, staff can verify:
- The correct model and accessories are present.
- The exterior is clean and the display area is uncluttered.
- Wheels, seat, visible fasteners, controls, and supplied restraints appear intact.
- There are no loose parts, exposed damage, unusual odors, or visible fluid contamination.
- The charger and remote, if applicable, are matched to the unit.
- The battery status and charging history are known from the dealer’s record.
- The manual, warnings, and product card are available.
- The demonstration route or space is clear.
- A trained staff member is present to supervise the activity.
If a staff member notices a safety concern or an unclear operating condition, the vehicle should be taken out of customer use and referred through the dealer’s supplier or after-sales process. Staff should not bypass a protective feature or improvise a repair to keep the demonstration running.
For a more detailed operational process, dealers can adapt the [kids ride-on car safety checklist](/blog/kids-electric-ride-on-car-safety-features-checklist) to their model documentation and local store procedures.
How should dealers manage demonstration equipment after use?
The post-demo routine should take only a few minutes but should be consistent. Return the remote, key, charger, manual, and display card to the matching tray. Remove personal items or temporary signage. Wipe visible marks from customer contact areas. Record any new concern, missing accessory, or customer question.
Use a status label that staff can understand at a glance:
- Ready: inspected and available for demonstration
- Charging: connected according to the approved instructions
- Hold: not available until a question or issue is reviewed
- Service review: removed from customer use and escalated to the responsible team
Do not leave a unit marked “ready” if its charger is missing or if a warning label has been damaged. Clear status control prevents a salesperson from making an uncertain unit available during a busy period.
How can wholesalers and importers specify demo equipment to a supplier?
When requesting samples or dealer demonstration units, include a clear equipment brief. It can specify the exact model, color, branding, accessories to include, packaging requirements, manuals, labels, charger details, and the intended market. Ask the supplier to identify any model-specific operating limits and to provide the current approved documents.
For a mixed order, request a demo allocation table rather than asking for “some display units.” The table can state which units are display-only, which are saleable stock, and which accessories must remain paired. If the dealer needs a cutaway, non-operating display, or showroom prop, describe it separately and label it so customers do not confuse it with a working product.
Before mass production or a private-label launch, compare the approved sample with the unit intended for demonstration. Record changes to color, controls, labels, packaging, or included accessories. A useful [OEM product brief](/blog/oem-kids-electric-ride-on-cars-complete-customization-guide) can reduce confusion between a prototype and the final sales configuration.
What mistakes should dealers avoid?
The most common organization mistakes are operational rather than technical:
- Keeping chargers and remotes in a shared, unlabeled drawer
- Displaying too many models without a clear comparison structure
- Mixing optional accessories with included accessories
- Allowing customers to use a vehicle without staff supervision
- Leaving a demonstration unit connected to power without a defined charging process
- Treating a sample with an unresolved issue as ready for use
- Making claims that are not supported by the current product documents
- Failing to log missing parts or recurring customer questions
- Storing cartons, cables, or cleaning supplies in the customer route
A dealer should also avoid making safety conclusions from appearance alone. The presence of a feature on one model does not prove that another model has the same feature. Always verify the applicable manual, label, specification, and supplier confirmation.
Frequently Asked Questions
How many kids ride-on car demonstration units does a dealer need?
There is no universal number. Start with one representative unit for each important model or product tier, then adjust based on store size, customer questions, and sales-channel needs. A distributor may use a smaller live fleet supported by accurate product sheets and digital content.
Should demo chargers and remotes be stored separately?
They can be stored in a central staff area, but each item should remain visibly matched to its vehicle. A labeled tray, pouch, or compartment for each demo ID is safer operationally than one shared box of similar-looking accessories.
Can customers drive the demonstration vehicle without an employee?
Dealers should use active adult supervision and a controlled demonstration process based on the product instructions. Customer access should be limited to the approved area, with staff controlling the session and stopping it if an unsafe condition appears.
What should a dealer do if a demo unit develops a problem?
Remove it from customer use, label its status as “hold” or “service review,” document the visible issue, and contact the responsible supplier or after-sales team. Do not bypass protections, rewire the vehicle, open the battery, solder connections, or attempt internal repairs.
How can OEM buyers keep demo equipment consistent across dealers?
Provide a dealer demo pack with the approved model list, product cards, safety notices, setup photographs, accessory matrix, inspection checklist, and escalation contacts. Use revision dates so dealers do not continue using superseded materials.
Conclusion
Organizing kids ride-on car demonstration equipment is a repeatable dealer process, not just a display decision. Match every vehicle with its charger, remote, documents, and accessories; mark the unit’s identity and status; separate customer areas from storage and charging; and use pre- and post-demo checklists. This structure helps overseas B2B buyers present products accurately while reducing missing-part issues and uncontrolled demonstrations.
For model selection, OEM sample planning, or a dealer-ready equipment brief, contact KidsRideCar at info@kidsridecar.com or send your requirements through the [B2B inquiry page](/inquiry).
Official references
Explore these external resources for current regulatory and trade guidance. Confirm requirements with the relevant authority before placing an order.
Ready to Start?
Factory-Direct · CE & ASTM Certified · MOQ from 50 Units
Our export team works with buyers in 60+ countries. Get a quote within 24 hours.
KR
Written by KidsRideCar
China's leading kids electric ride-on car manufacturer. 500,000+ units shipped annually to 60+ countries. CE, ASTM & EN71 certified.