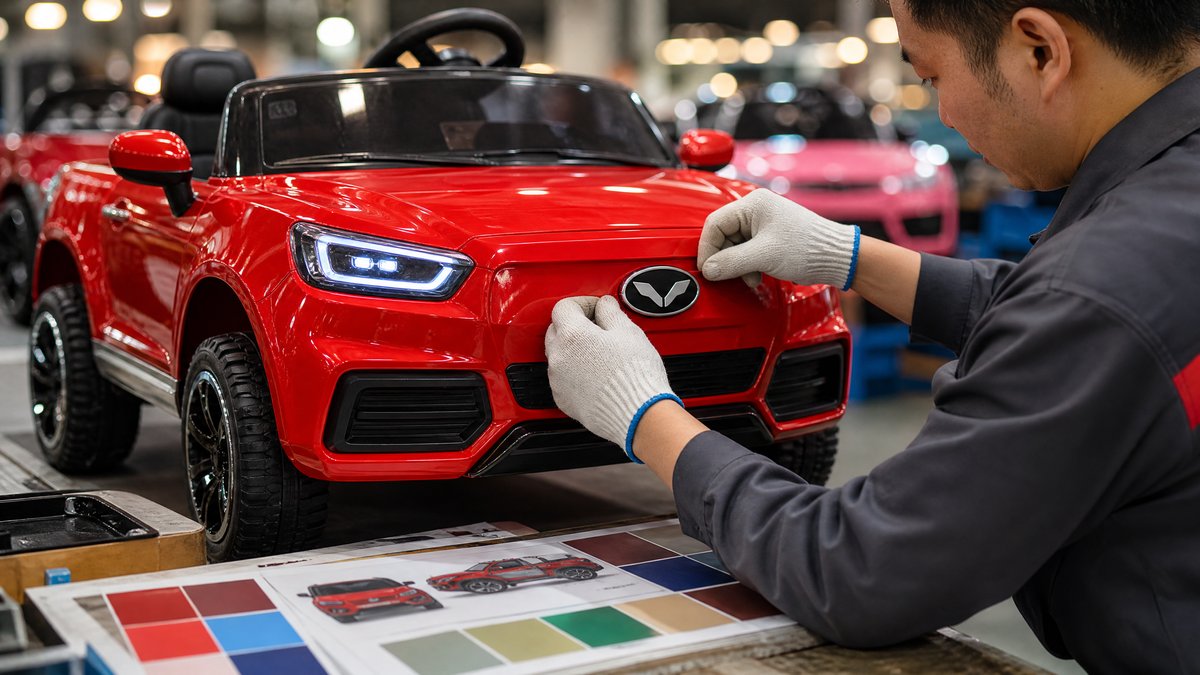
For an OEM kids ride-on car, logo placement is more than a decoration decision. It affects brand recognition in product photos, how the vehicle looks on a retail floor, whether the mark remains visible during normal use, and how consistently the factory can reproduce it across colors and model revisions.
The short answer: OEM buyers should review logo placement on the actual vehicle surface, from customer-facing viewing angles and at the intended retail distance. Confirm the logo’s size, contrast, orientation, attachment method, clear space, safety implications, cleanability, artwork version, and repeatability before approving a production sample. Record the approved location with annotated images and model-specific instructions rather than relying on a verbal description such as “put the logo on the hood.”
This guide is for importers, wholesalers, distributors, retailers, and private-label buyers sourcing [kids ride-on car products](/products/) for one or more markets.
Why logo placement deserves a formal OEM review
A logo can look balanced in an artwork file but appear too small on a curved hood, disappear against a dark body color, or be hidden when a child sits in the vehicle. Placement affects brand visibility, visual balance, production consistency, retail photography, and after-sales identification.
Logo placement should not replace required product markings, warnings, instructions, or traceability information. Plan those items separately for the destination market and product configuration.
What should an OEM buyer decide before reviewing placement?
Before asking a supplier to place a logo, define the commercial use case. A useful [OEM supplier brief](/blog/) should state the target model or models, body colors, sales channels, preferred logo versions, and whether the mark must appear on the vehicle, packaging, documentation, or accessories.
1. Identify the primary viewing angle
Decide where customers will most often see the product. Common options include:
- front three-quarter view for e-commerce photography;
- side view for retail display and showroom aisles;
- rear view when vehicles are stored or demonstrated in rows; and
- close-up view for catalogs, dealer presentations, and social media.
Do not assume that one position serves every channel. A small hood emblem may work in a close-up but be unreadable in a group display. A side logo may be highly visible in a showroom but absent from the standard product image.
2. Separate brand marks from model and safety information
Decide which elements are part of the brand system and which are functional or mandatory information. The brand logo, sub-brand, model name, decorative badge, age guidance, warnings, rating plates, and electrical labels should not be treated as interchangeable artwork.
Ask the supplier to show a placement plan that keeps the brand mark visually distinct from information that customers must read. Never cover, move, or reduce safety-related information simply to create more room for a logo.
3. Establish the approved artwork versions
Provide vector artwork where available and specify approved color, one-color, reversed, and compact versions. State whether the factory may use a wordmark, icon, or combined lockup, and include minimum clear space. Use a file revision such as “BrandMark_White_v3” so an old file is not used on a repeat order.
A practical logo-placement review checklist
Review the logo on a physical sample or a realistic prototype image. The following checklist turns a subjective branding decision into a documented approval.
Location and visibility
Check whether the mark is visible when the vehicle is:
- viewed from the front, side, and rear three-quarter angles;
- parked on the floor at normal customer viewing distance;
- shown with doors, hood, steering wheel, or other movable parts in their normal positions; and
- photographed against the planned background and lighting.
Look for visual obstruction from mirrors, windscreens, handles, seat backs, dashboard features, wheels, or packaging inserts. If a two-seat and single-seat version share a logo brief, verify each body shape separately. A location that works on one shell may be hidden or visually off-center on another.
Scale and proportion
A logo should suit the viewing context without making the product look unbalanced. Ask for proposed width and height on the actual panel, then compare the mark and its clear space with body proportions, lights, grille, and door outlines.
Contrast across color variants
Review every planned body color. A white logo may work on a red body but lose contrast on a light gray or white body. A dark logo may be legible on a pale shell but disappear on black or navy.
If multiple logo treatments are needed, record the rule by body color and model. Do not leave color selection to production staff at the line. Ask for a color-by-color approval sheet or annotated sample photographs.
Surface and geometry
Confirm that the selected panel is suitable for the chosen application method. Curves, textured plastic, recessed areas, sharp edges, seams, and flexible parts can affect how a mark looks and stays attached.
Inspect the logo from a normal standing position as well as straight on. On a curved surface, lettering can appear distorted or the edges may lift visually. If the logo crosses a panel gap or removable part, confirm how alignment will be maintained after assembly.
Interaction with use and handling
Consider the ordinary contact points created by carrying, opening, buckling, steering, charging, cleaning, and storing the vehicle. A logo positioned where hands, footwear, straps, or packaging repeatedly rub may become less attractive over time.
This does not mean a buyer should promise a particular durability period without supporting evidence. Instead, ask the supplier to recommend a suitable application method for the surface and to explain what visual inspection will be performed on approved samples and production units.
Safety and user information
Keep logos away from controls, pedals, steering movement, ventilation openings, battery access points, charging labels, warning labels, and other instructions. A decorative mark must not reduce legibility, create a misleading instruction, add a detachable small part where one is not appropriate, or introduce a sharp or protruding feature.
Safety review should remain model-neutral: inspect the finished location, edges, adhesion, and interaction with normal use according to the product’s intended design and the requirements applicable to the destination market. Request qualified testing or compliance advice where needed; do not treat a logo review as a substitute for a full product safety assessment.
Which logo application methods should buyers compare?
The best method depends on the body material, surface shape, desired appearance, order plan, and supplier process. Ask for a recommendation and compare it on the sample rather than selecting from a method name alone.
Printed or applied graphics
A printed mark or applied graphic can support detailed color artwork and may work well on broad panels. Review edge quality, alignment, color appearance, and resistance to normal cleaning and handling as appropriate for the product. Confirm whether the artwork sits on a flat panel or must conform to a curve.
Molded, embossed, or raised branding
A molded or raised mark can provide an integrated appearance. It may require a model-specific tooling or body revision, so clarify tooling ownership, approval stages, and whether the feature will carry across future colors or variants. Inspect edges and transitions to ensure the feature is compatible with the product’s finished design.
Badge or emblem
A badge can create a premium visual cue, but the buyer should examine its profile, attachment, edges, and location. It should not become an unintended snag point or interfere with normal handling. Confirm how the badge is supplied and controlled for repeat orders.
Removable labels or stickers
A sticker may be practical for a pilot order or a short-run campaign, but buyers should ask how it will be positioned consistently and how the finish looks on the body surface. Do not assume a temporary-looking application is suitable for a permanent private-label program.
For all methods, request a sample using the planned surface, artwork version, and placement. If the factory proposes a substitute process, approve it explicitly instead of allowing an unrecorded change.
How to approve a logo location with a supplier
A simple approval workflow can prevent avoidable rework:
1. Send a placement brief. Include the model, body-color variants, artwork revision, preferred zones, prohibited zones, application method requested for review, and intended sales channels.
2. Request visual proposals. Ask for annotated photographs, drawings, or renderings showing dimensions, center lines, distances from panel edges, and the viewing angle.
3. Review a physical sample. Inspect the mark on the actual shell or a representative pre-production unit under ordinary retail lighting.
4. Gather cross-functional feedback. Include purchasing, product, quality, marketing, customer service, and—where relevant—packaging or compliance reviewers.
5. Record one approved master. Mark the exact position with model and color references. Note whether the location changes for different body styles.
6. Link the approval to the purchase order. State that production should follow the approved artwork and placement revision, subject to agreed quality checks.
7. Verify before shipment. Include logo location, artwork version, contrast, finish, and obvious placement defects in the inspection checklist. Photograph representative units when appropriate.
The goal is a reference that teams can use consistently when approving samples, checking production, creating listings, and managing repeat orders.
Procurement examples: applying the review in real buying situations
Example 1: An online-first private-label launch
An importer plans to sell a single model through its own store and marketplace listings. The buyer selects a side-panel logo because it appears in the three-quarter product image. During sample review, the mark is partly hidden when the door is open. The buyer can either move the mark to a fixed panel or update the image plan, but should record the decision before production.
Example 2: A retailer with several body colors
A distributor wants one logo system across red, white, and dark blue vehicles. The buyer reviews the same mark on all three colors and finds that one treatment lacks contrast on the white shell. The purchase specification can define an approved alternate version for light-colored bodies rather than allowing ad hoc substitutions.
Example 3: A repeat-order program
A wholesaler reorders a successful model after a body-panel revision. The logo coordinates from the original version may no longer produce the same visual result. The buyer compares the new shell with the approved reference, requests a revised annotated placement, and updates the artwork and sample records before releasing the repeat order.
For broader customization planning, buyers can also consult the [OEM customization guide](/blog/oem-kids-electric-ride-on-cars-complete-customization-guide) and use a structured [product inquiry](/inquiry) when requesting model-specific options.
Frequently Asked Questions
Should the logo go on the hood or the side of a kids ride-on car?
Neither location is universally best. Choose the panel that remains visible in the main sales view, has suitable geometry, does not obstruct safety or operating information, and can be reproduced consistently. Review both locations on the actual model and document the approved one.
How large should an OEM logo be on a ride-on car?
There is no universal size. Set the size according to the body proportions, viewing distance, logo shape, retail photography, and clear space around the mark. Approve measured dimensions on the physical sample rather than relying on a percentage of the artwork canvas.
Can one logo placement work for every body color?
It can, but it should be verified rather than assumed. Contrast changes with the shell color and finish. If one treatment is not legible on a planned variant, define an approved alternate logo color or version.
What should be included in a logo-placement approval record?
Include the model and revision, body color, artwork file or revision number, application method, logo dimensions, location measurements or reference points, prohibited areas, annotated images, approval date, and the names or roles of the approving parties. Link the record to the purchase order and inspection checklist.
Should the logo be applied to accessories or packaging too?
That is a separate scope decision. If branding extends to packaging, manuals, remote controls, chargers, or accessories, review each surface and item independently. Keep the vehicle logo approval from being interpreted as approval for every other branded component.
Conclusion: approve a location, not just an artwork file
A strong OEM logo-placement review connects brand strategy with practical production control. Buyers should assess visibility, proportion, contrast, surface geometry, handling, safety information, application method, and model variation on the finished or representative product. Then they should turn the decision into a revision-controlled approval record tied to purchasing and inspection.
This approach helps importers, wholesalers, distributors, and retailers present a consistent private-label product without making unsupported assumptions about durability, compliance, or performance. For model-specific OEM logo-placement questions, contact KidsRideCar at info@kidsridecar.com or [send an inquiry](/inquiry) with the target model, body colors, artwork revision, and intended sales channel.
Official references
Explore these external resources for current regulatory and trade guidance. Confirm requirements with the relevant authority before placing an order.
Ready to Start?
Factory-Direct · CE & ASTM Certified · MOQ from 50 Units
Our export team works with buyers in 60+ countries. Get a quote within 24 hours.
KR
Written by KidsRideCar
China's leading kids electric ride-on car manufacturer. 500,000+ units shipped annually to 60+ countries. CE, ASTM & EN71 certified.